|
|||||
|
|||||
New Front Suspension
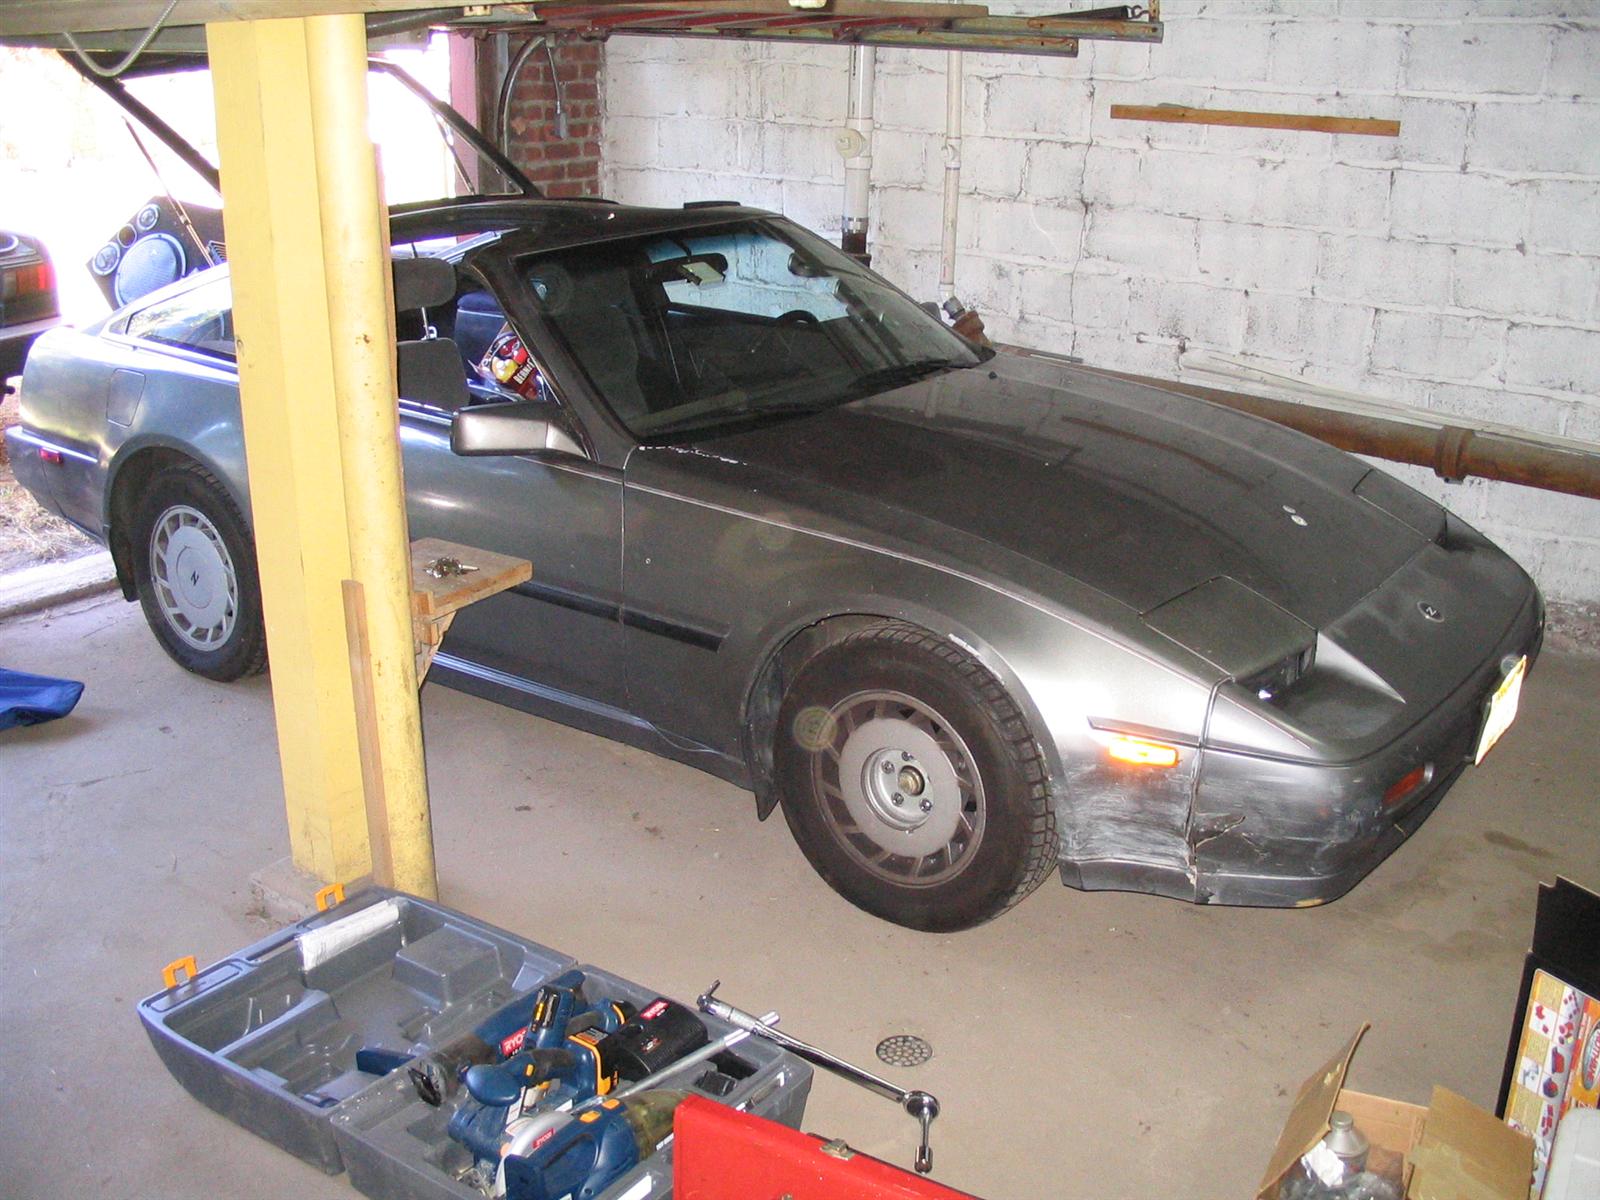
9/5/05 —
Now that I had the garage, it was time to take care of some tasks which I had been putting off for far too long. Among these was rebuilding my front suspension. The OEM struts were long ago blown out, and I had about 0 damping on the front of the car. Combining this with the rear's new shocks made for some squirrely handling.
I had a pair of Tokico HP struts to match the shocks which I had recently replaced. I also had a Prothane Master Bushing Kit with a set of polyurethane control arm bushings to go in.
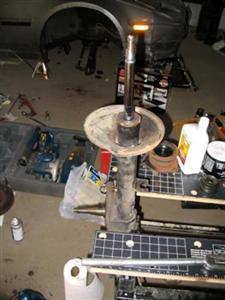
First up was removing all of the old suspension components to get ready to replace them. This a fairly simple task. I parked her in the garage and got to work:
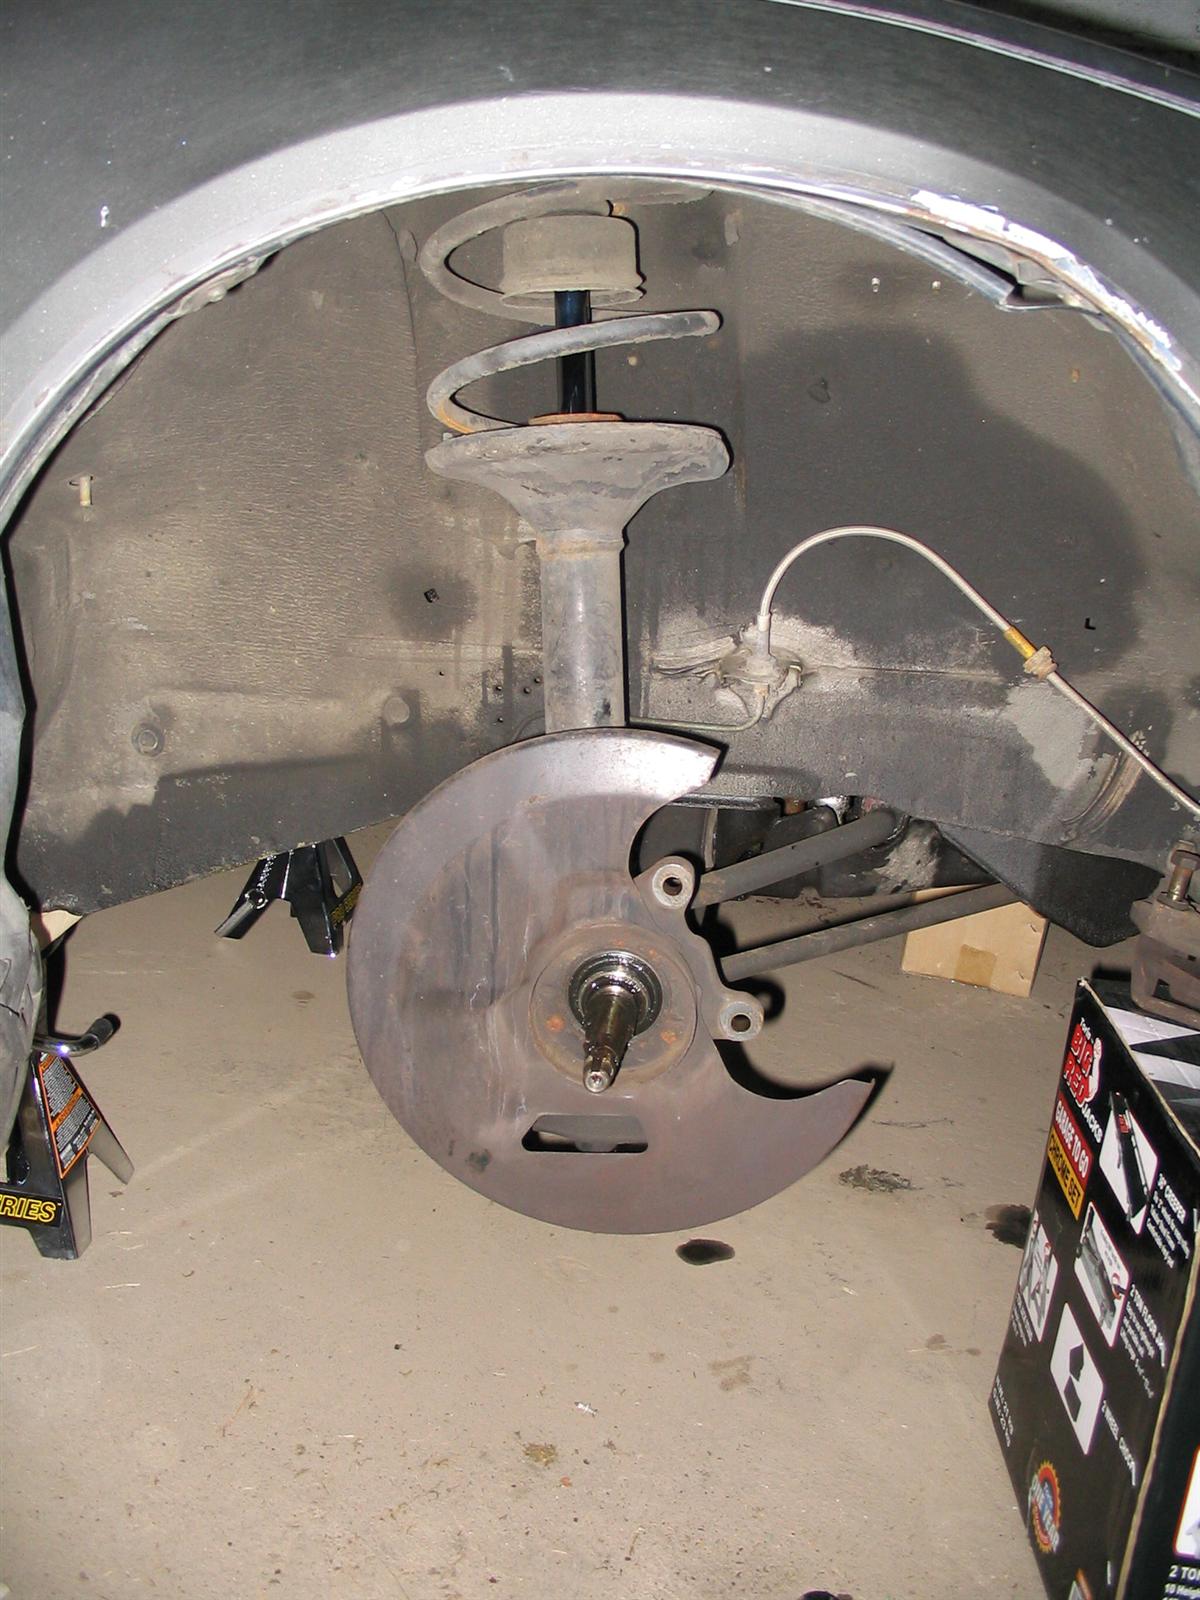
- Put the front of the car up on jack stands and remove the wheels
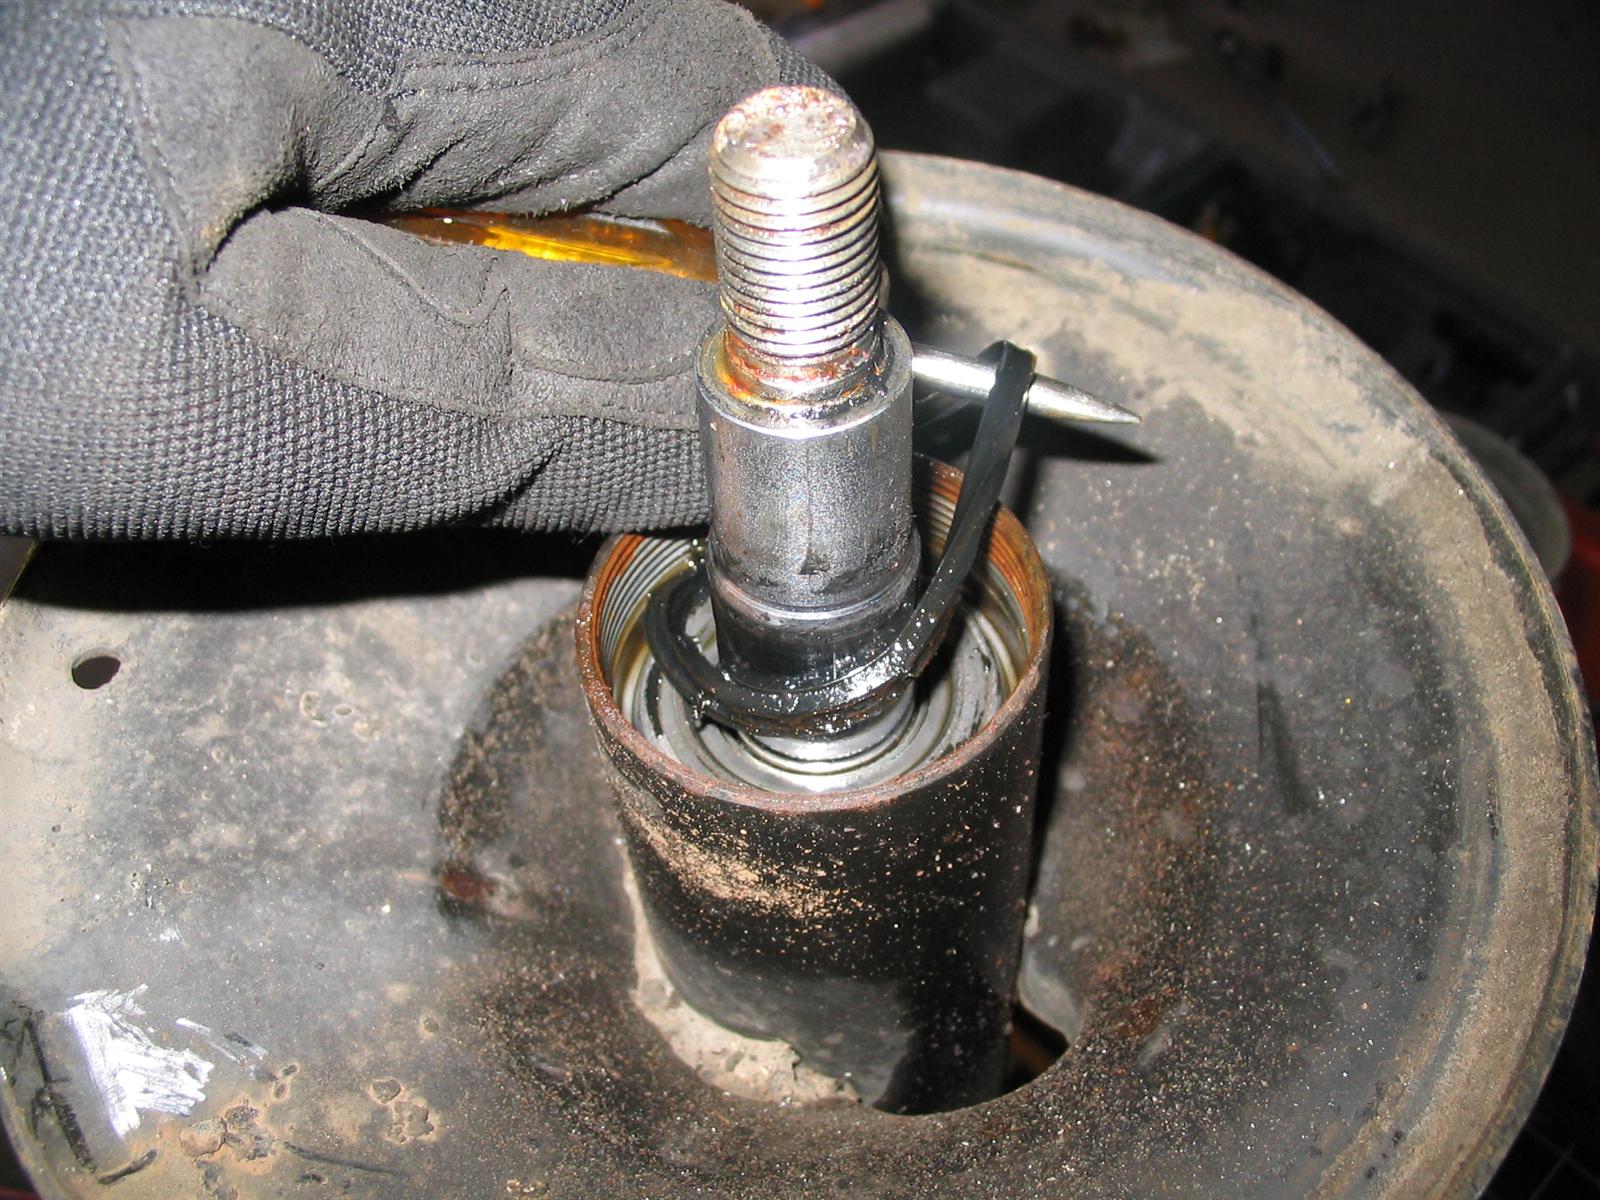
- Loosen the gland nut (the huge nut that holds the cartridge in the strut) *very important*
- Remove the 2 bolts securing the caliper slide bracket from the steering knuckle
- Tie or prop the caliper out of the way
- Pop the dust cap off of the bearing with a big pair of pliers and remove the cotter pin, keeper cage, and bearing nut *Note
- Slide the rotor off
- Remove the 2 bolts securing the knuckle to the strut body
- Remove the 3 nuts holding the top of the strut assembly in the engine bay
- Lower the assembly down and remove from the vehicle
 |
 |
 Step 4 |
 Step 6 |
 Step 7 |
 Step 9, Strut Removed! |
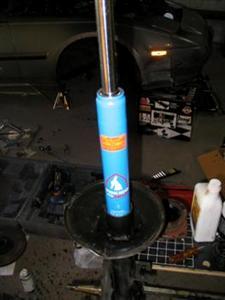
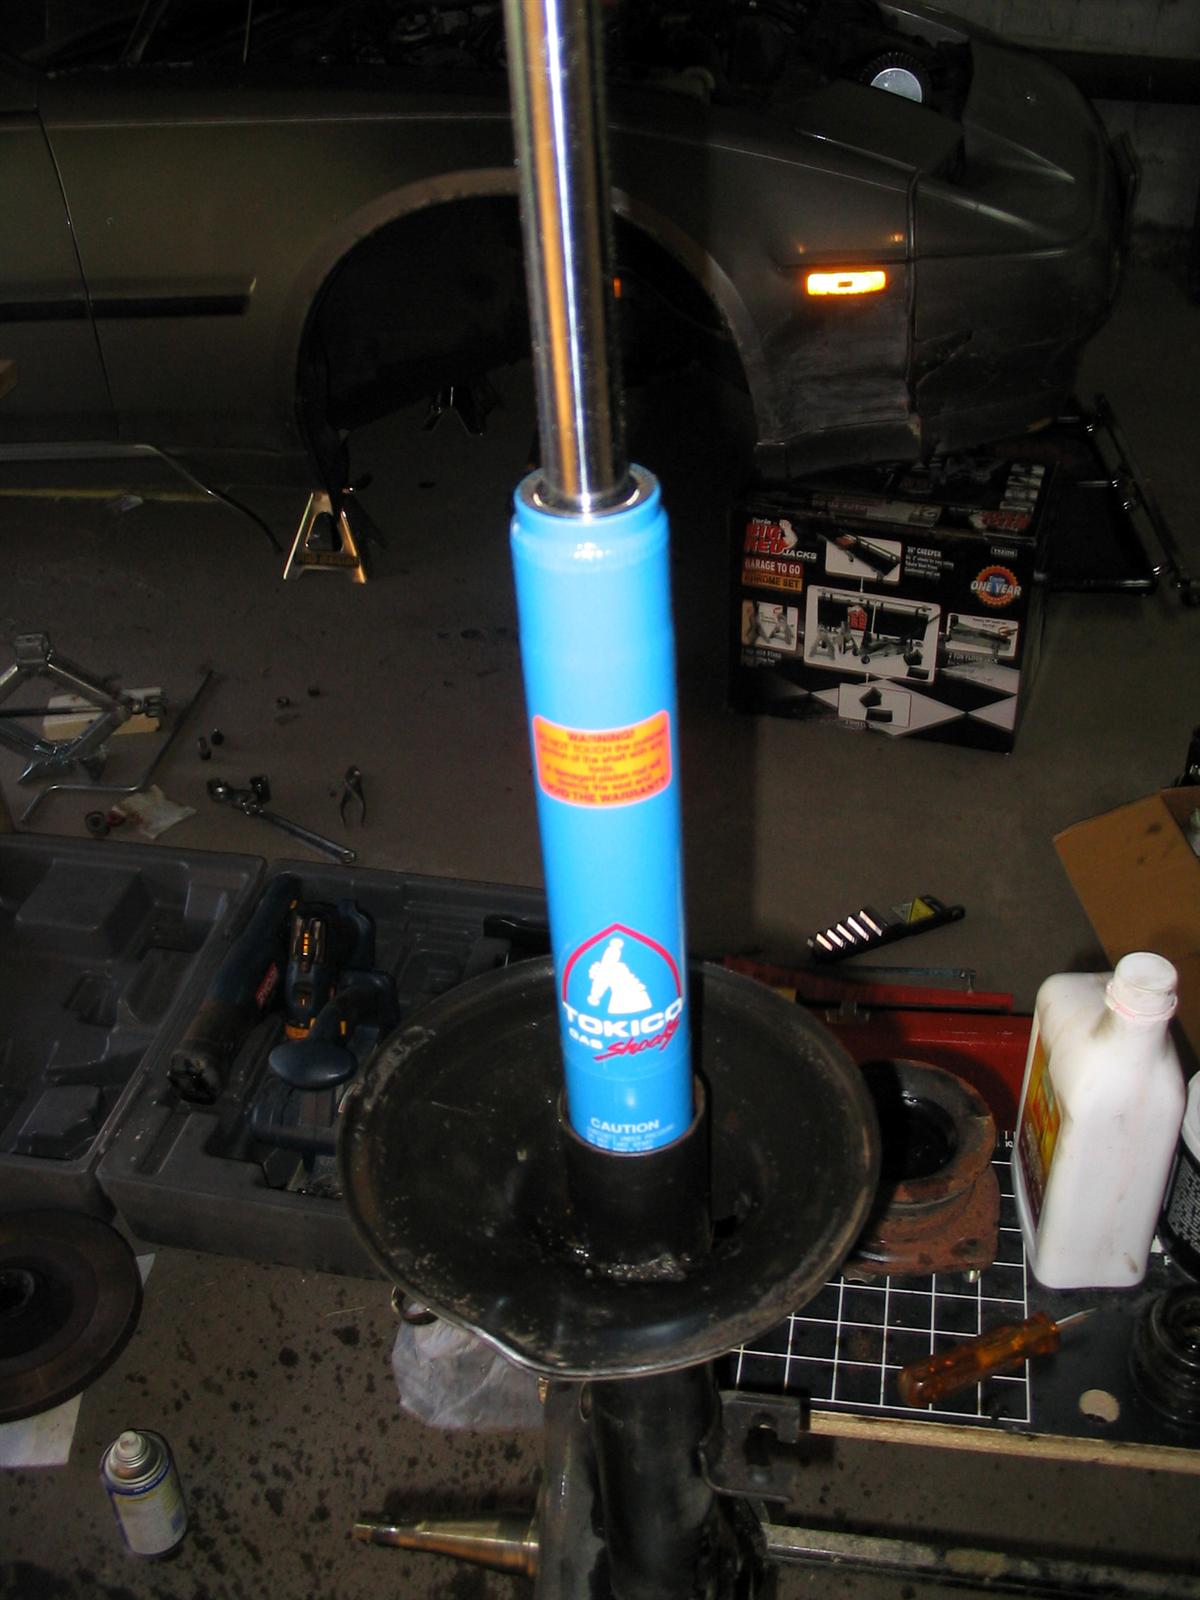
Aftermarket Strut Insert
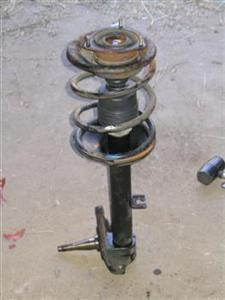
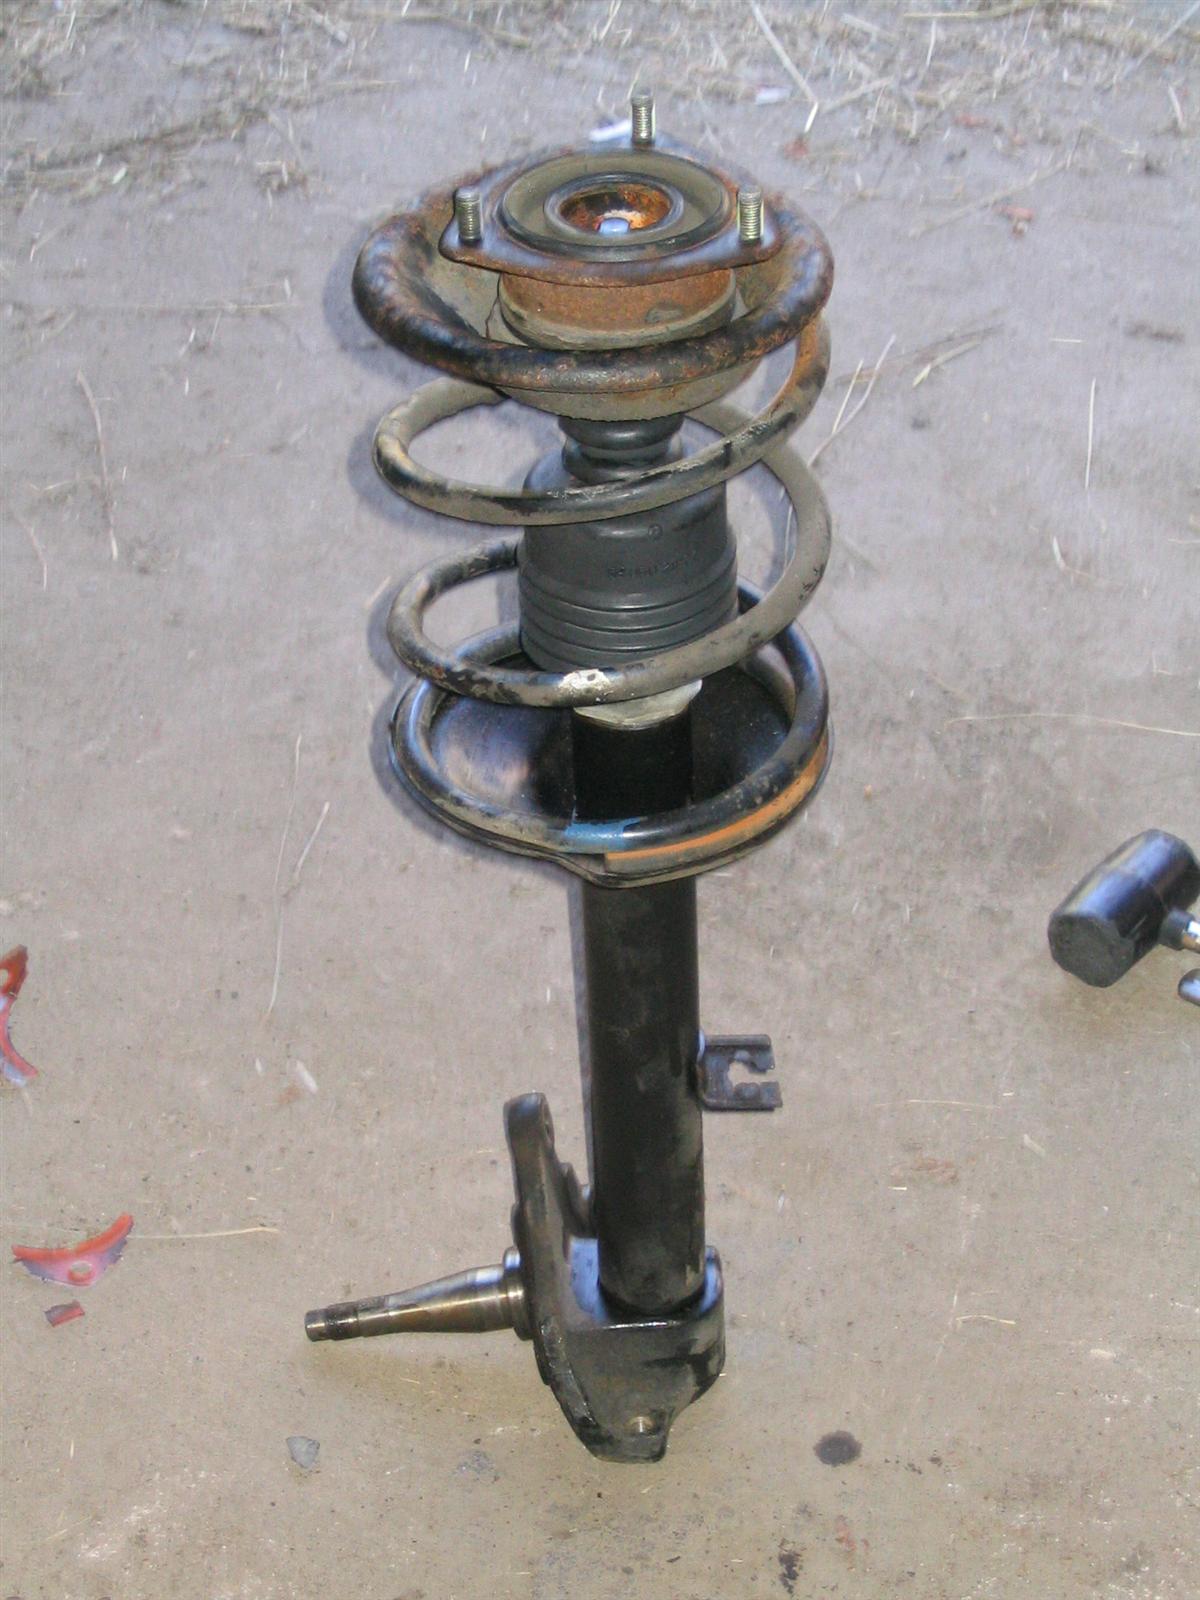
Next up was installing the new Tokico HP strut cartridges into the old housings, and replacing the associated hardware.
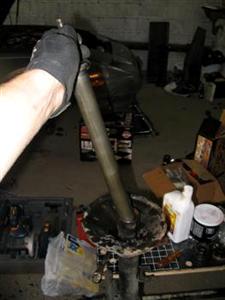
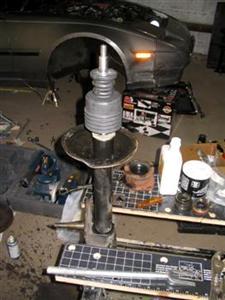
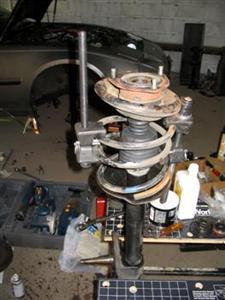
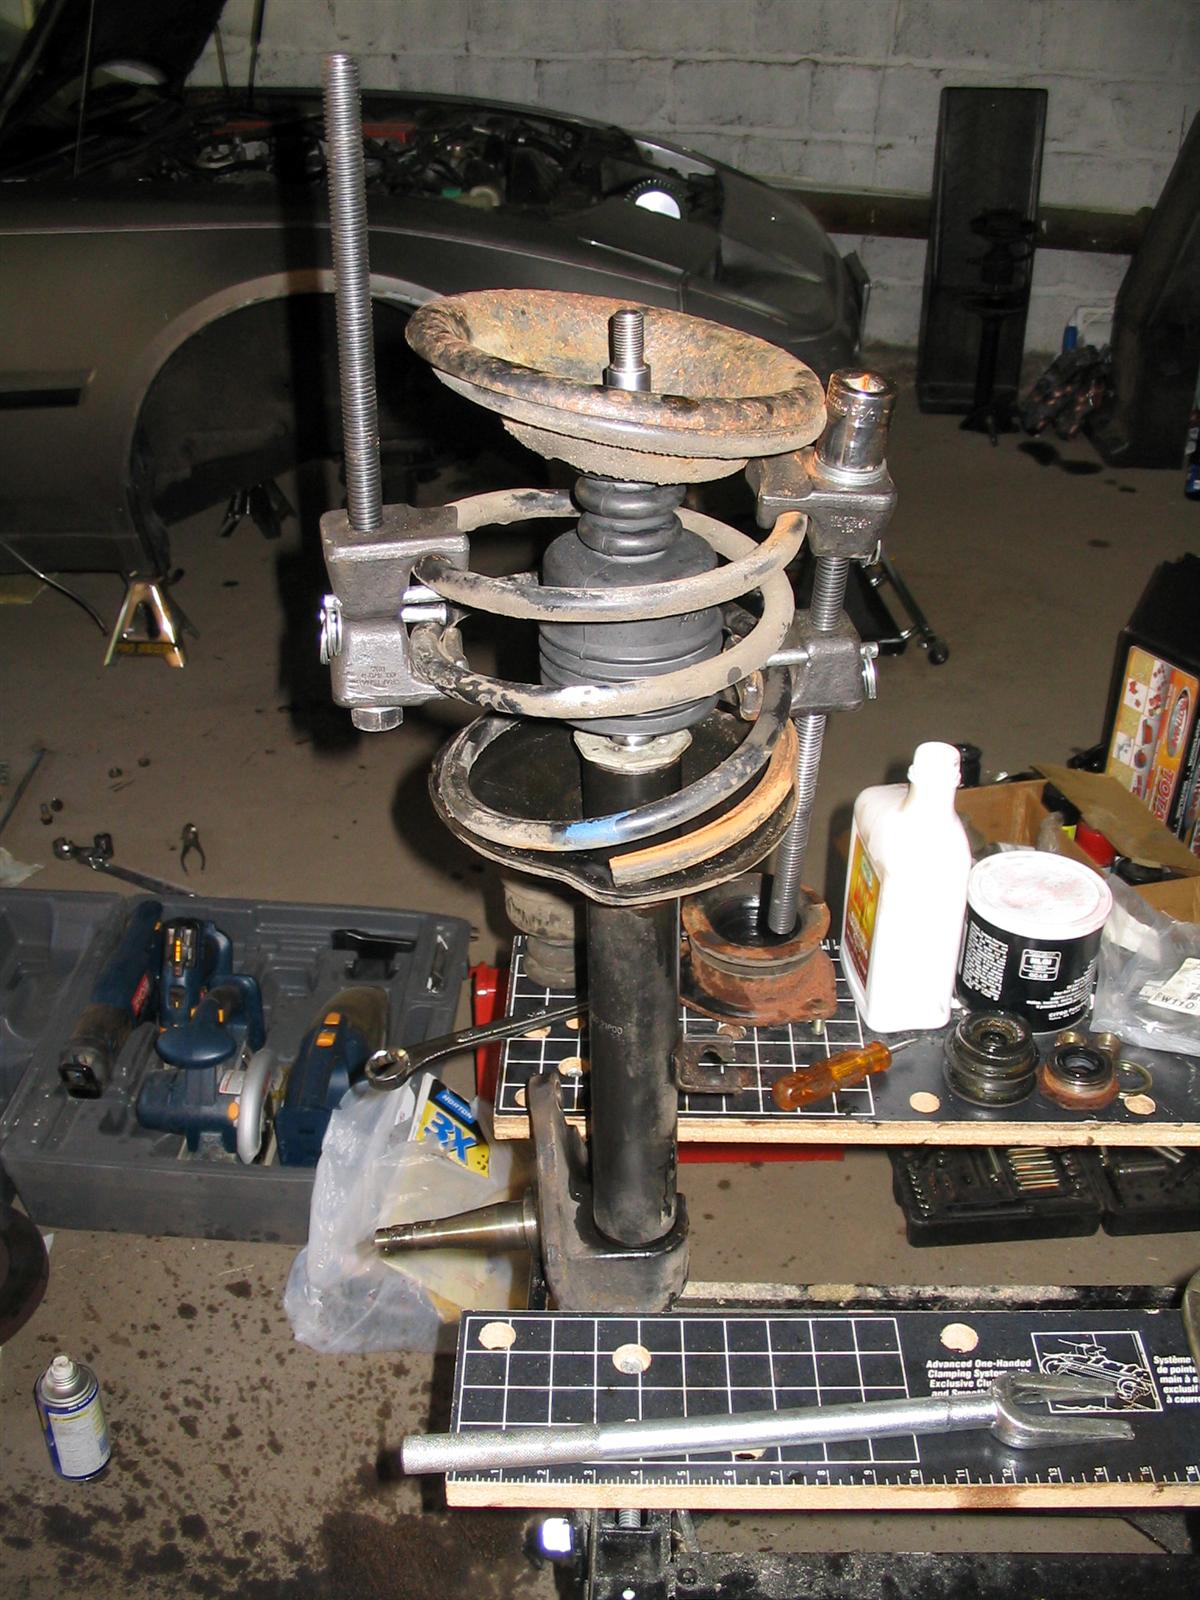
- Compress the spring enough that the top retainer loosens up with a set of spring compressors
- Note the relation between the top and bottom spring retainers and the spring, as they must be installed in a particular orientation (the parts are asymmetrical). There are notches on both retainers to help you figure out where the ends of the springs go when reinstalling.
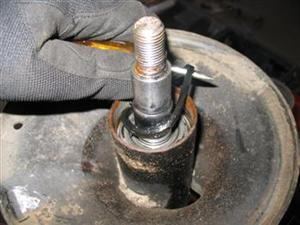
- Remove the nut on the strut rod at the top of the assembly and pull the pieces apart. You will have to hold the strut mount when you do this to keep the strut rod form turning. I used an open wrench to hold 2 of the 3 studs on the strut mount.
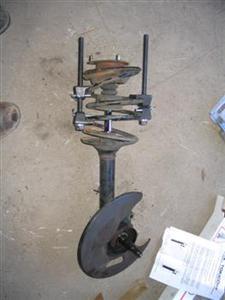

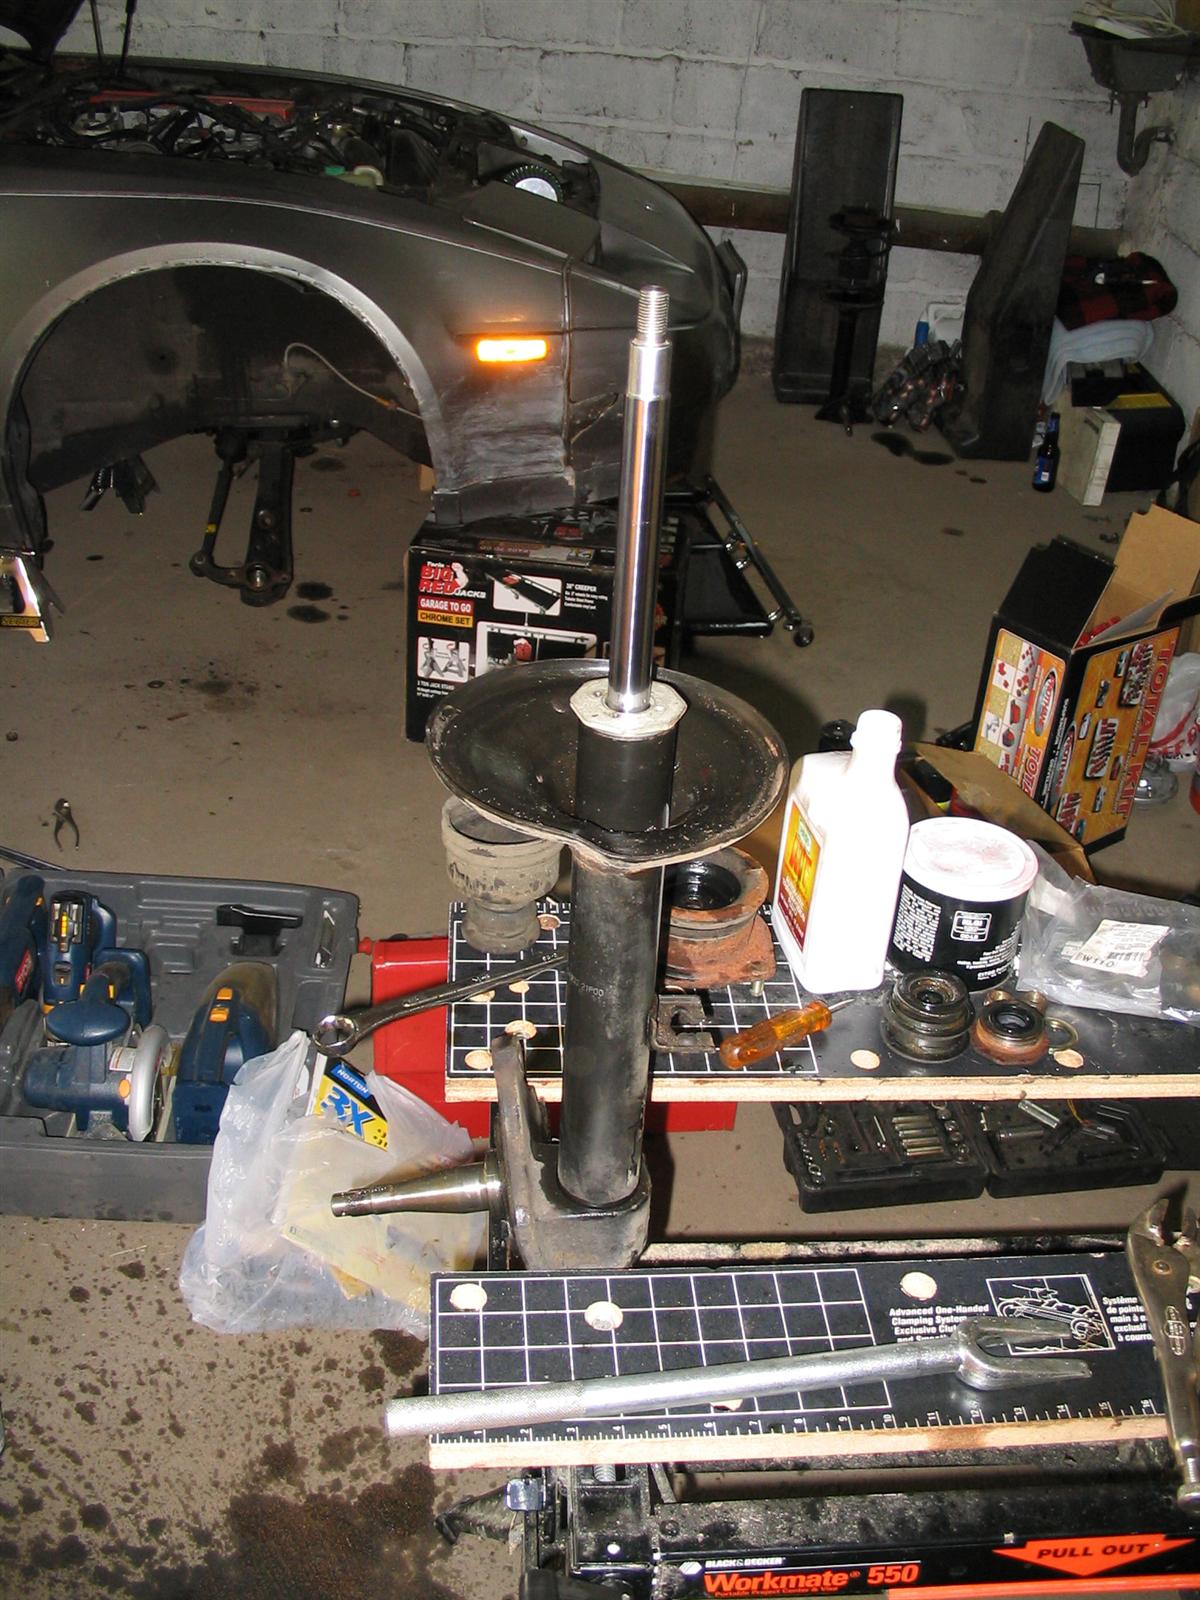
- Put the strut into a suitable vice and remove the gland nut. You'll be glad you loosened it while the strut was installed on the car (or you will reinstall it in the car so you can loosen it, like I ended up doing)
- Remove the O-ring seal
- Pull out the original cartridge insert and drain the rest of the old hydraulic fluid
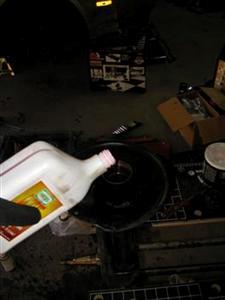
- Pour some kind of oil in the housing to act as a heat transfer medium between the cartridge and the housing. I used some ATF I had lying around.
- Drop the new cartridge into the housing, making sure it reaches the bottom without problem.
- Put in the required number of spacers (these should come with your new cartridge) according to your install instructions. (I think that I needed to use 2, but I don't remember) Install the new gland nut and torque to a reasonable amount. Final torquing will be done with the strut in-car.
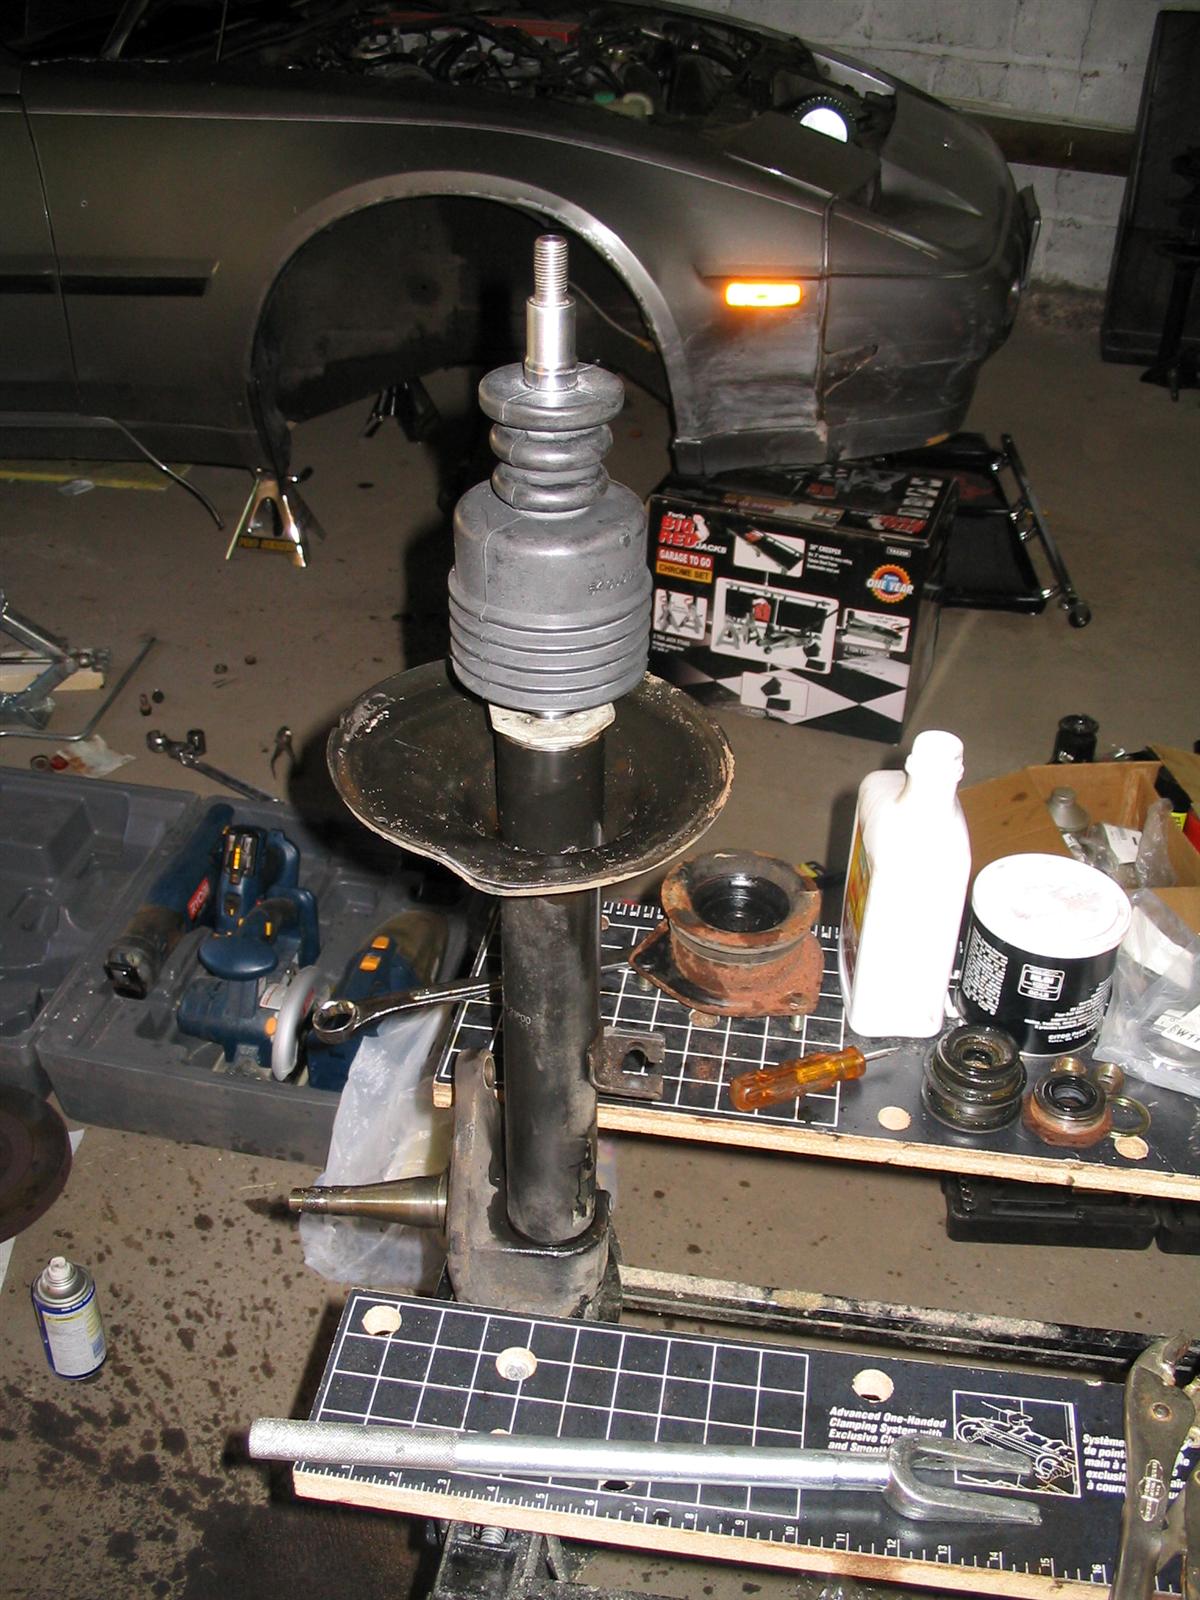
- Put the dust boot/bump stop onto the strut rod (I used a new one)

- Install the spring and the top retainer (noting their orientation).
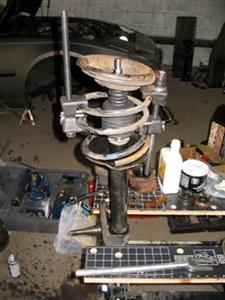
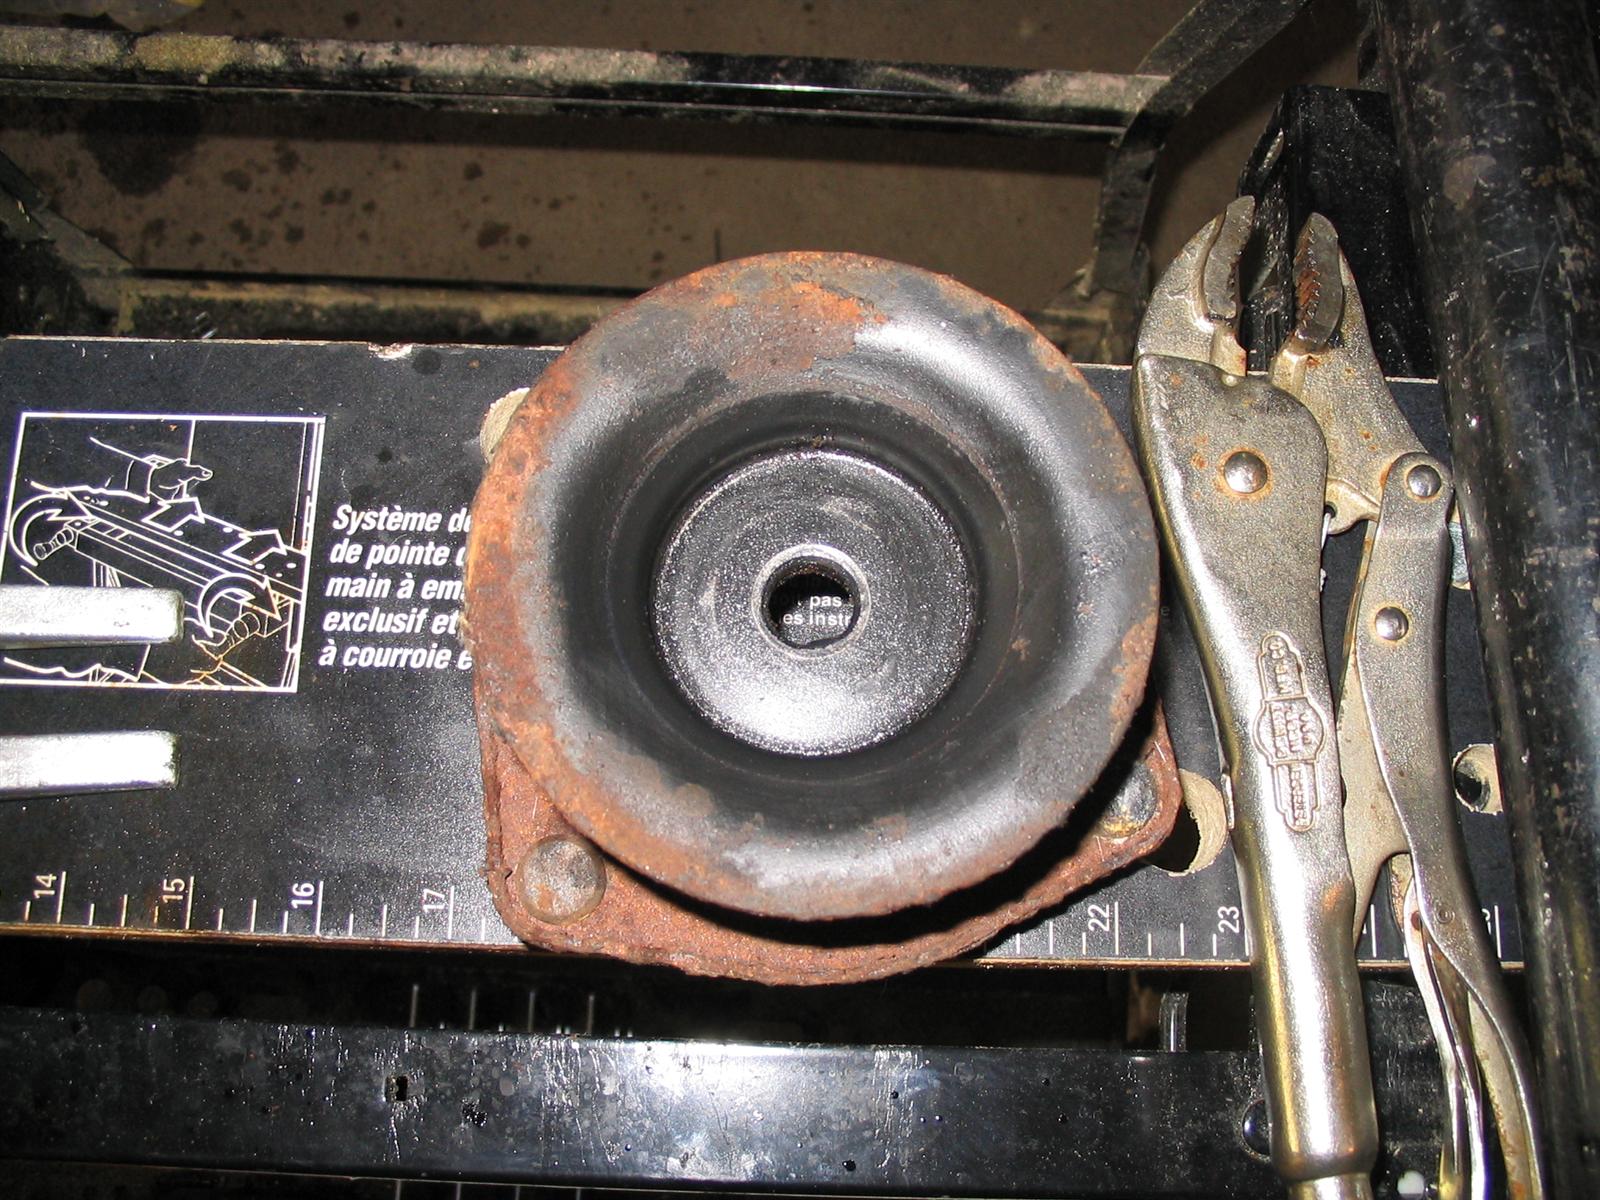
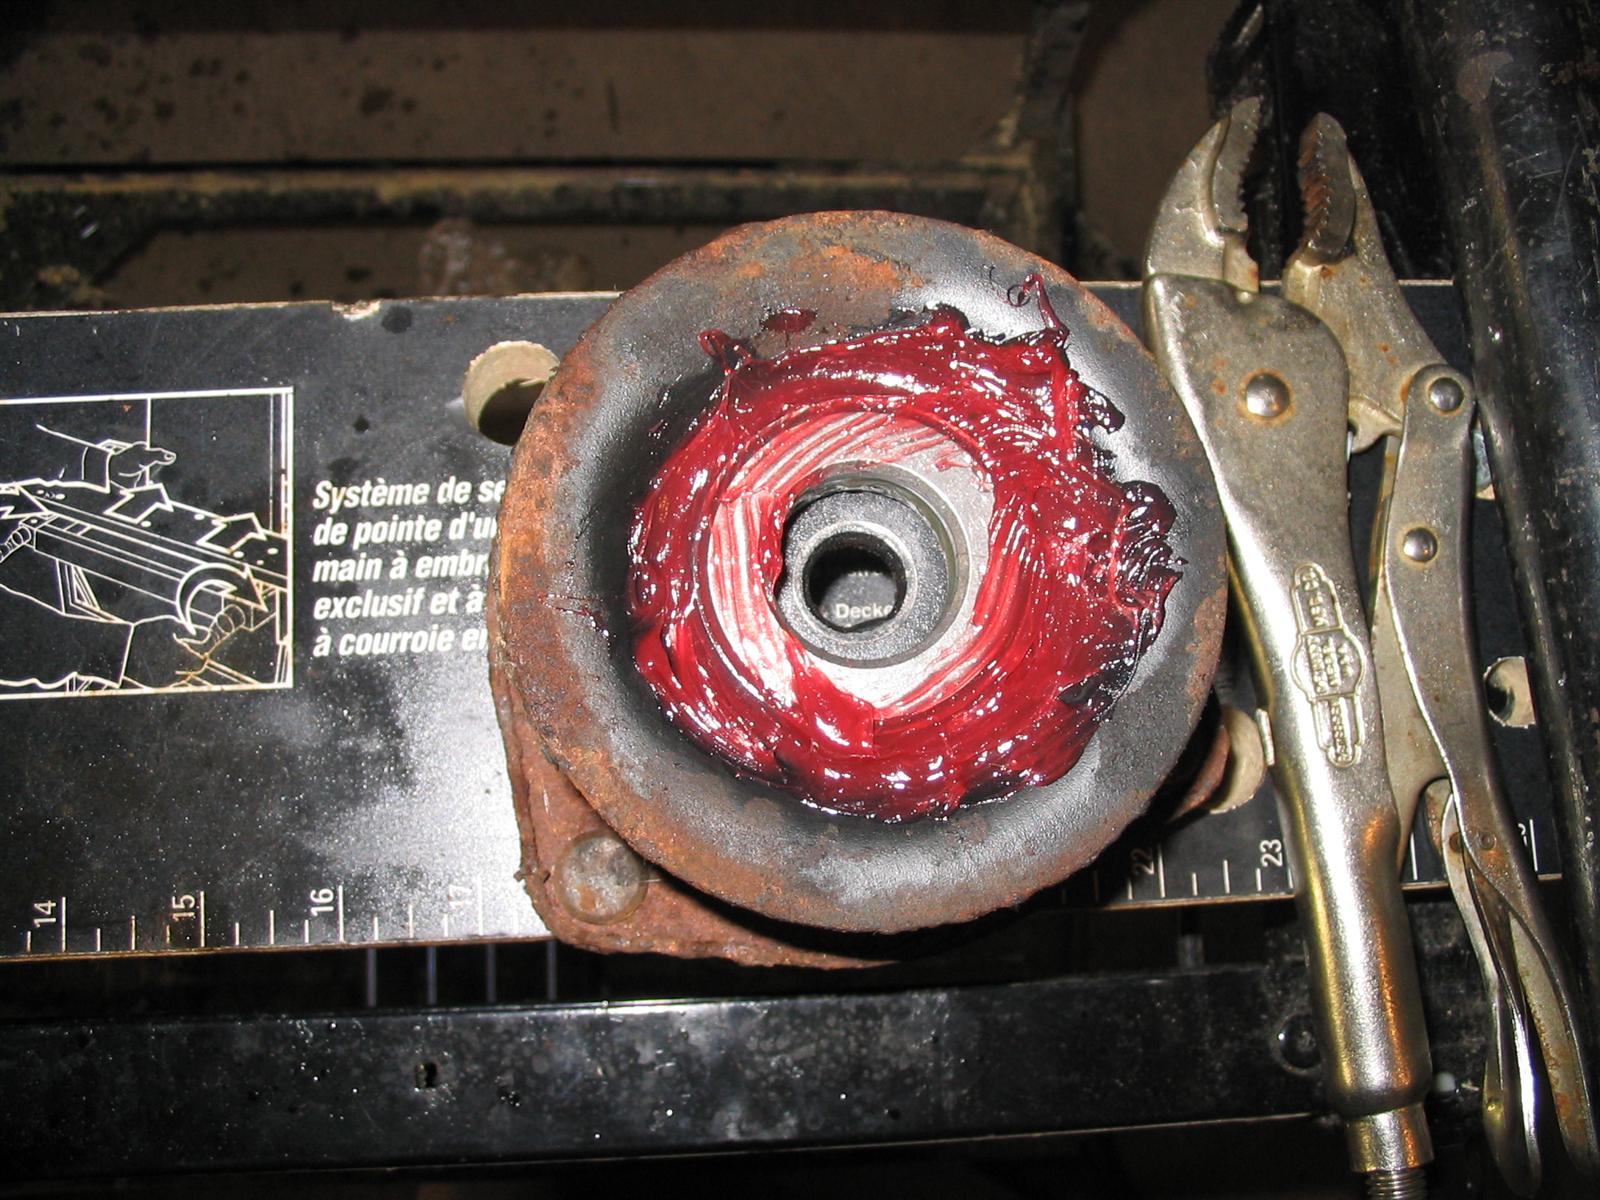
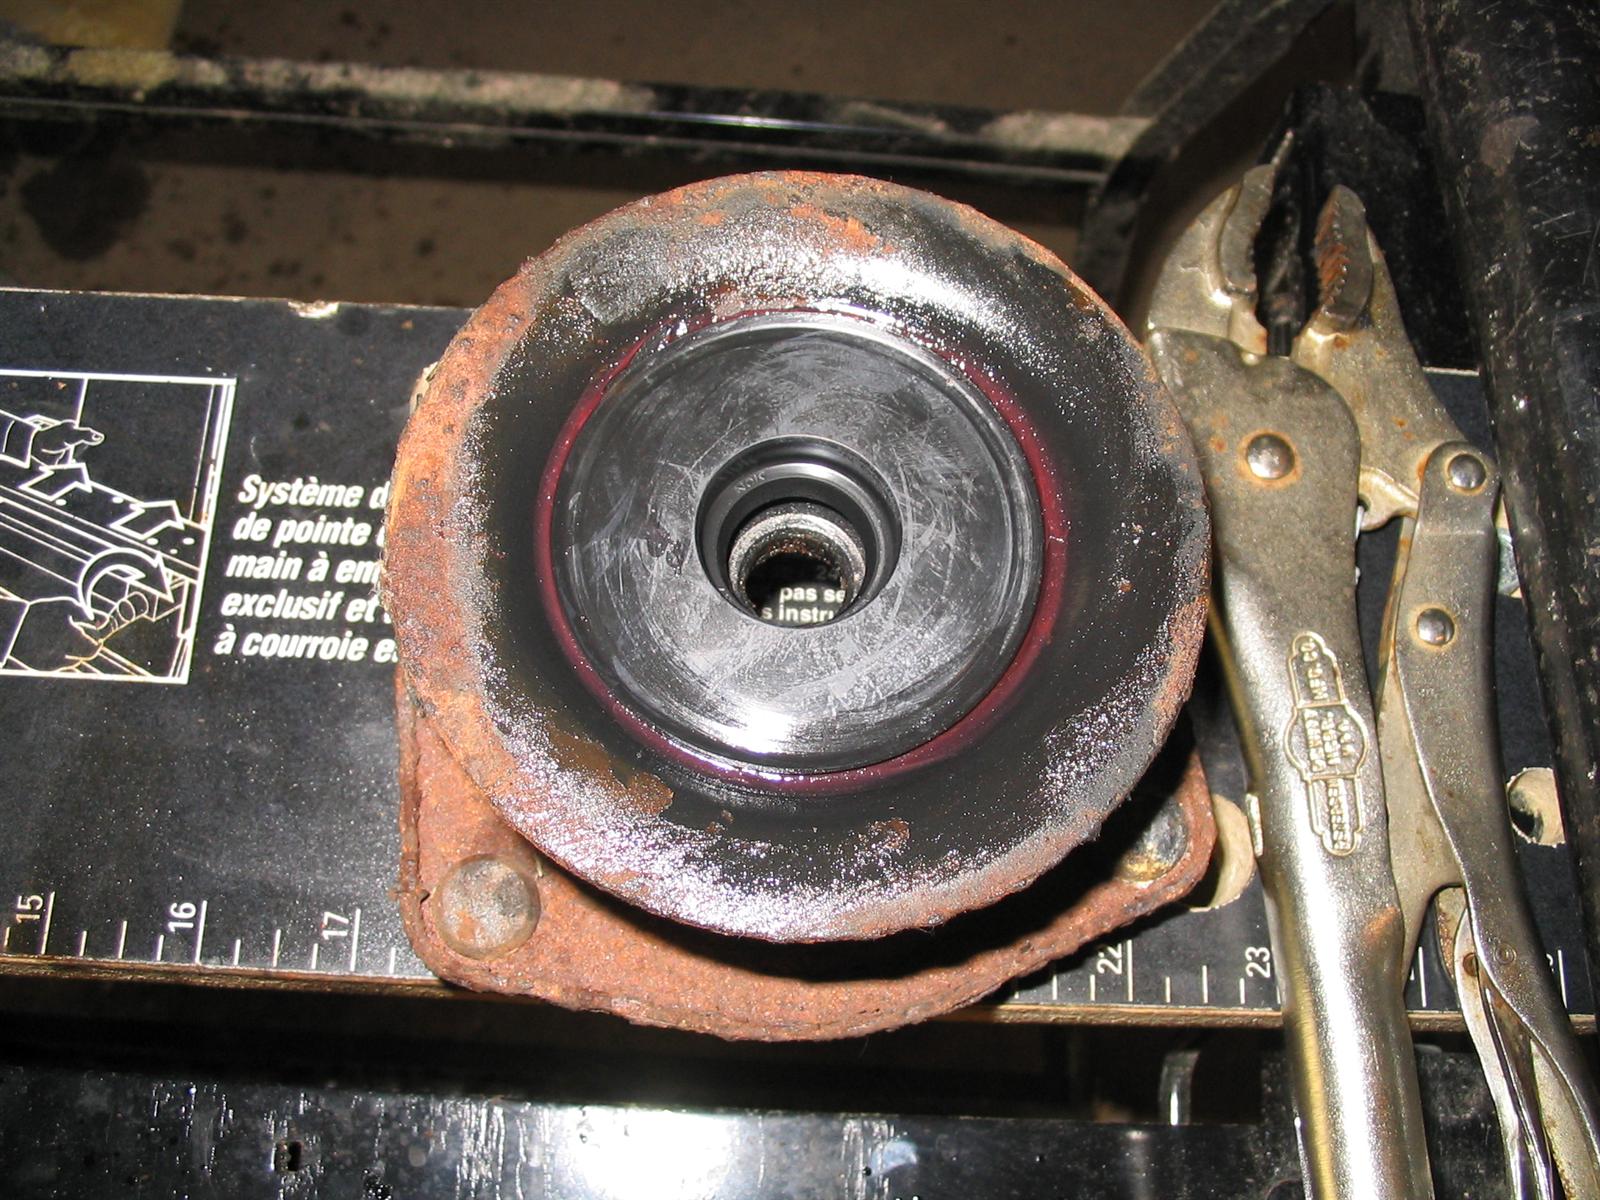
- I used a new strut bearing, so I packed it up in the strut mount with new grease and a new dust cover/seal . I then installed it on the strut assembly and tightened things down with the new top nut.
Clean it out nice first
New bearing
A little overkill with the grease
Cleaned up and new cover seal installed - Remove the spring compressors from the spring and the assembly is done. Repeat for other side.

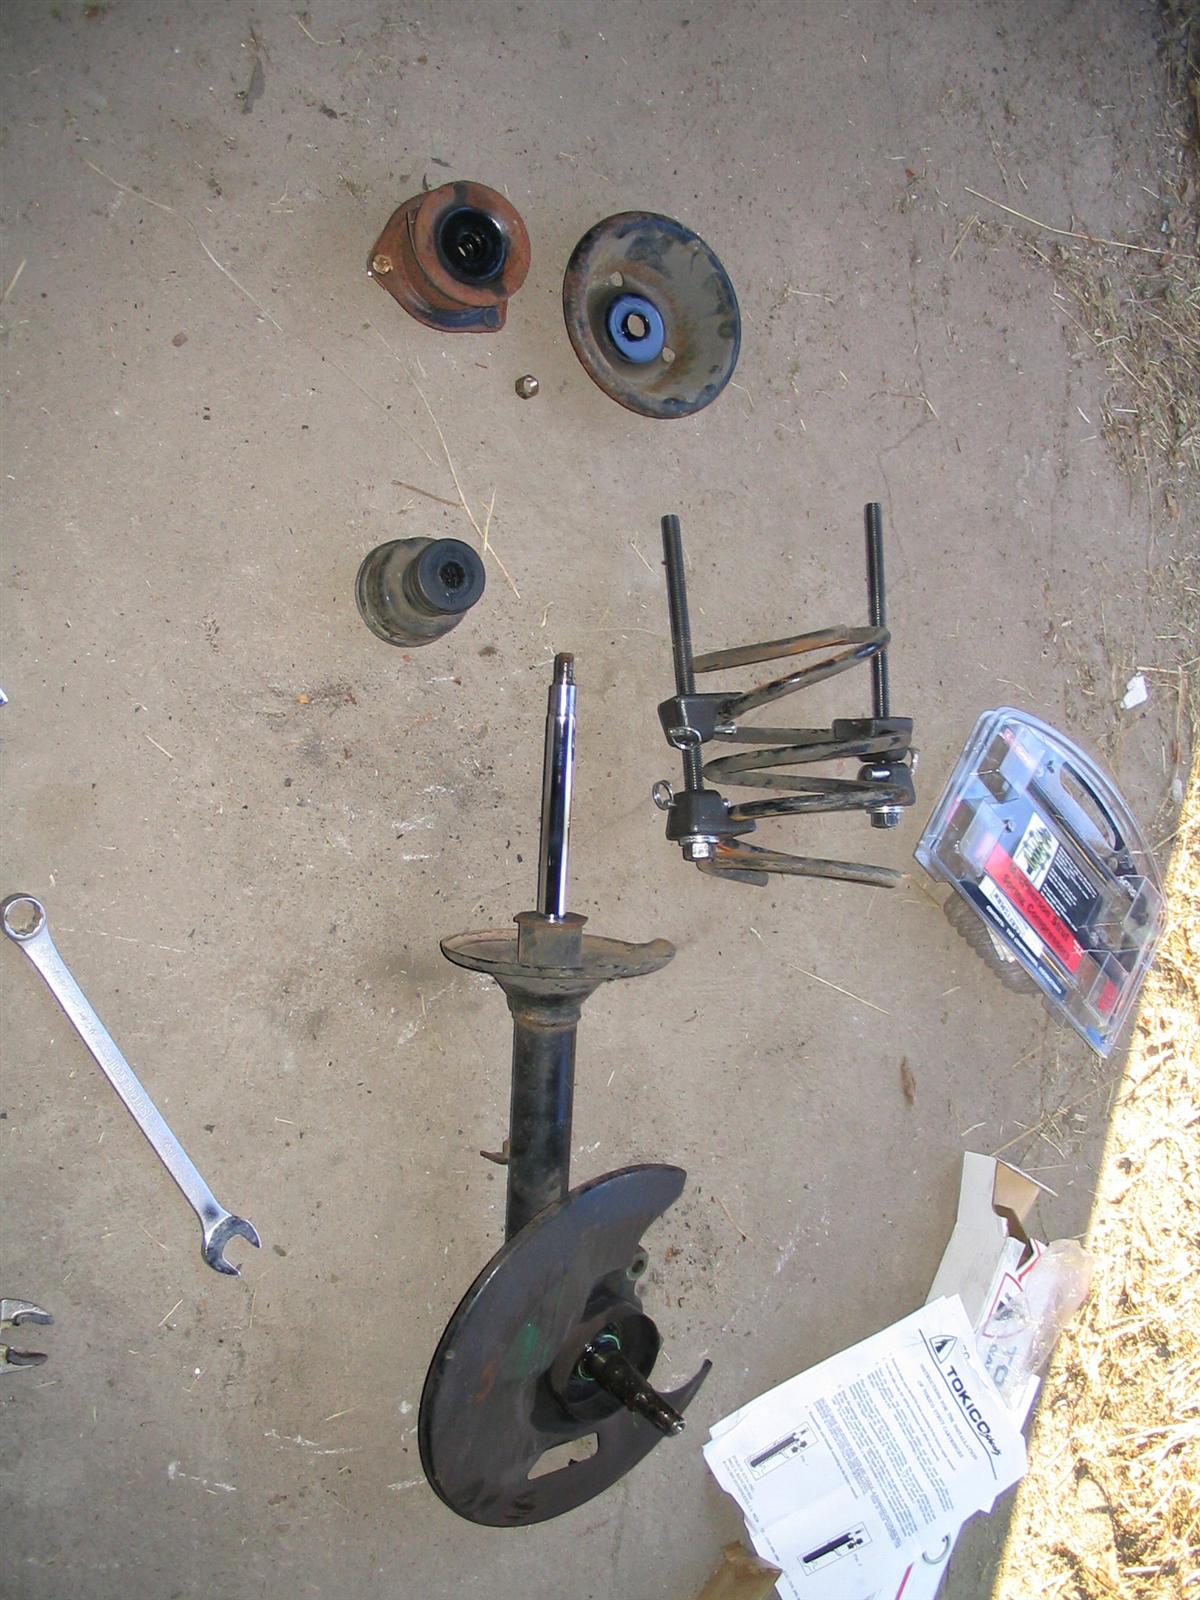


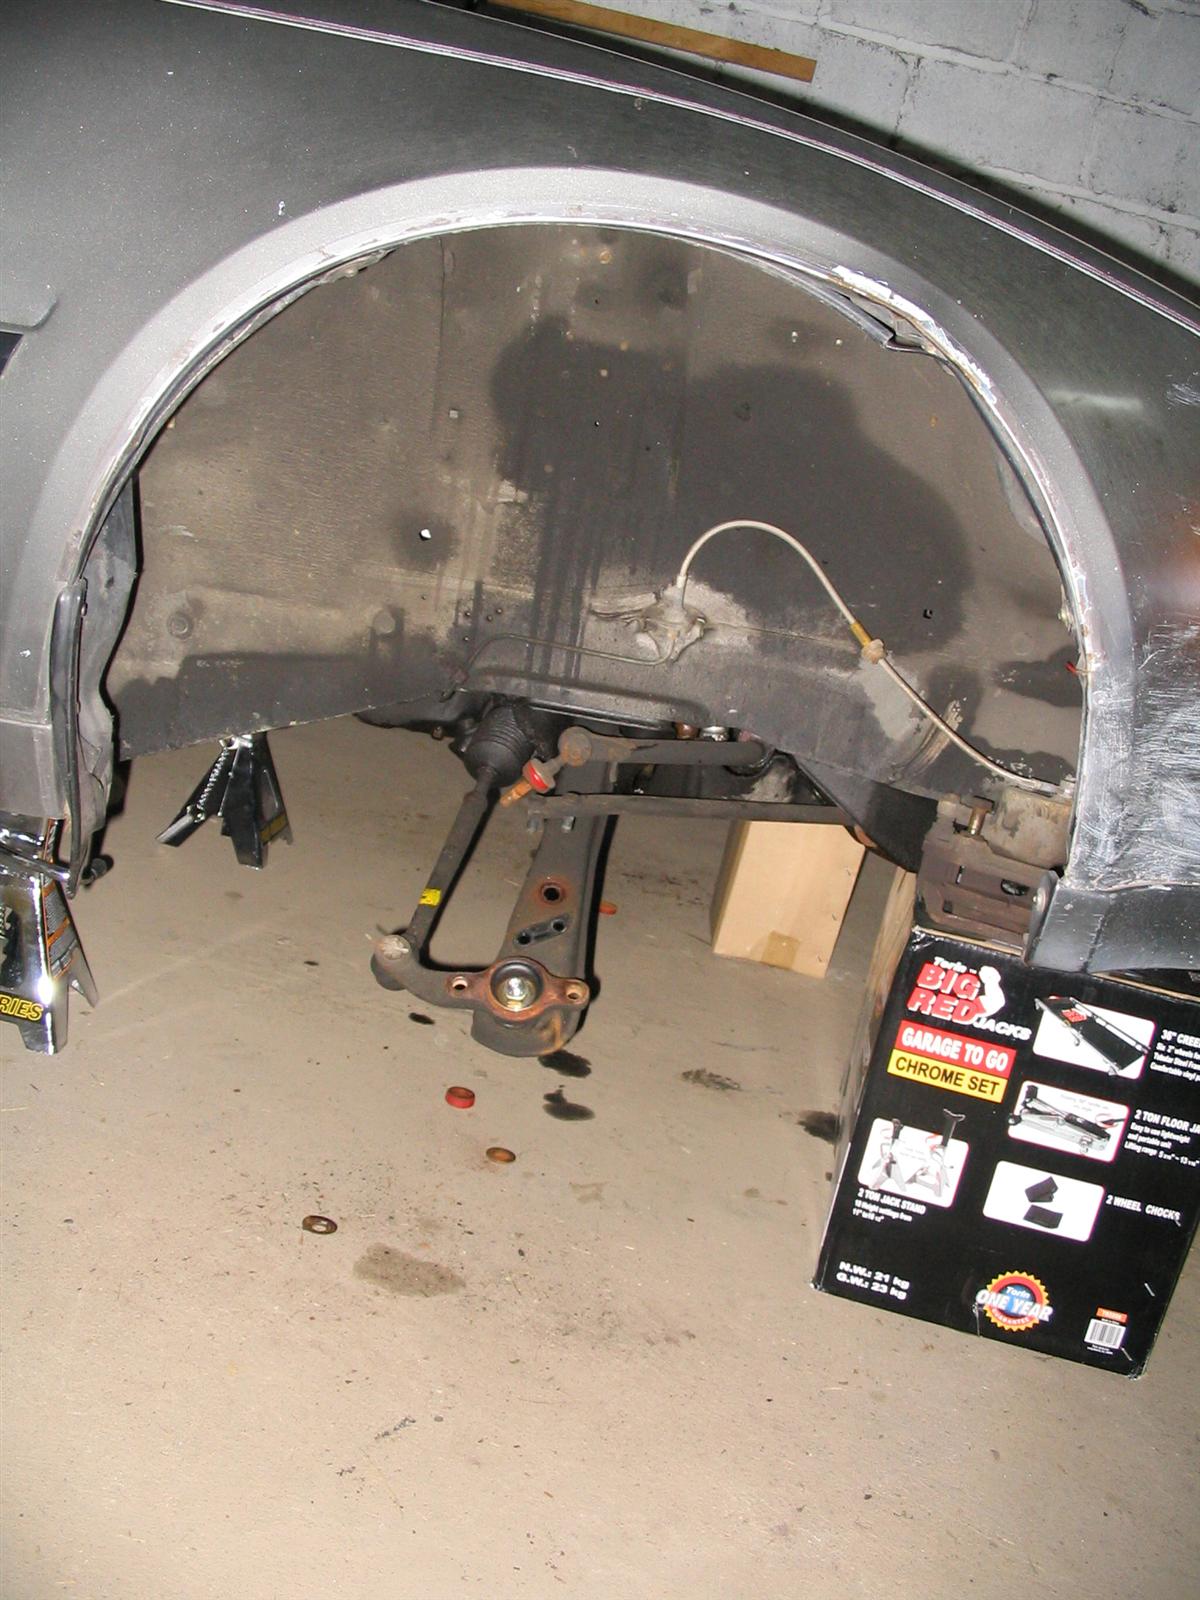
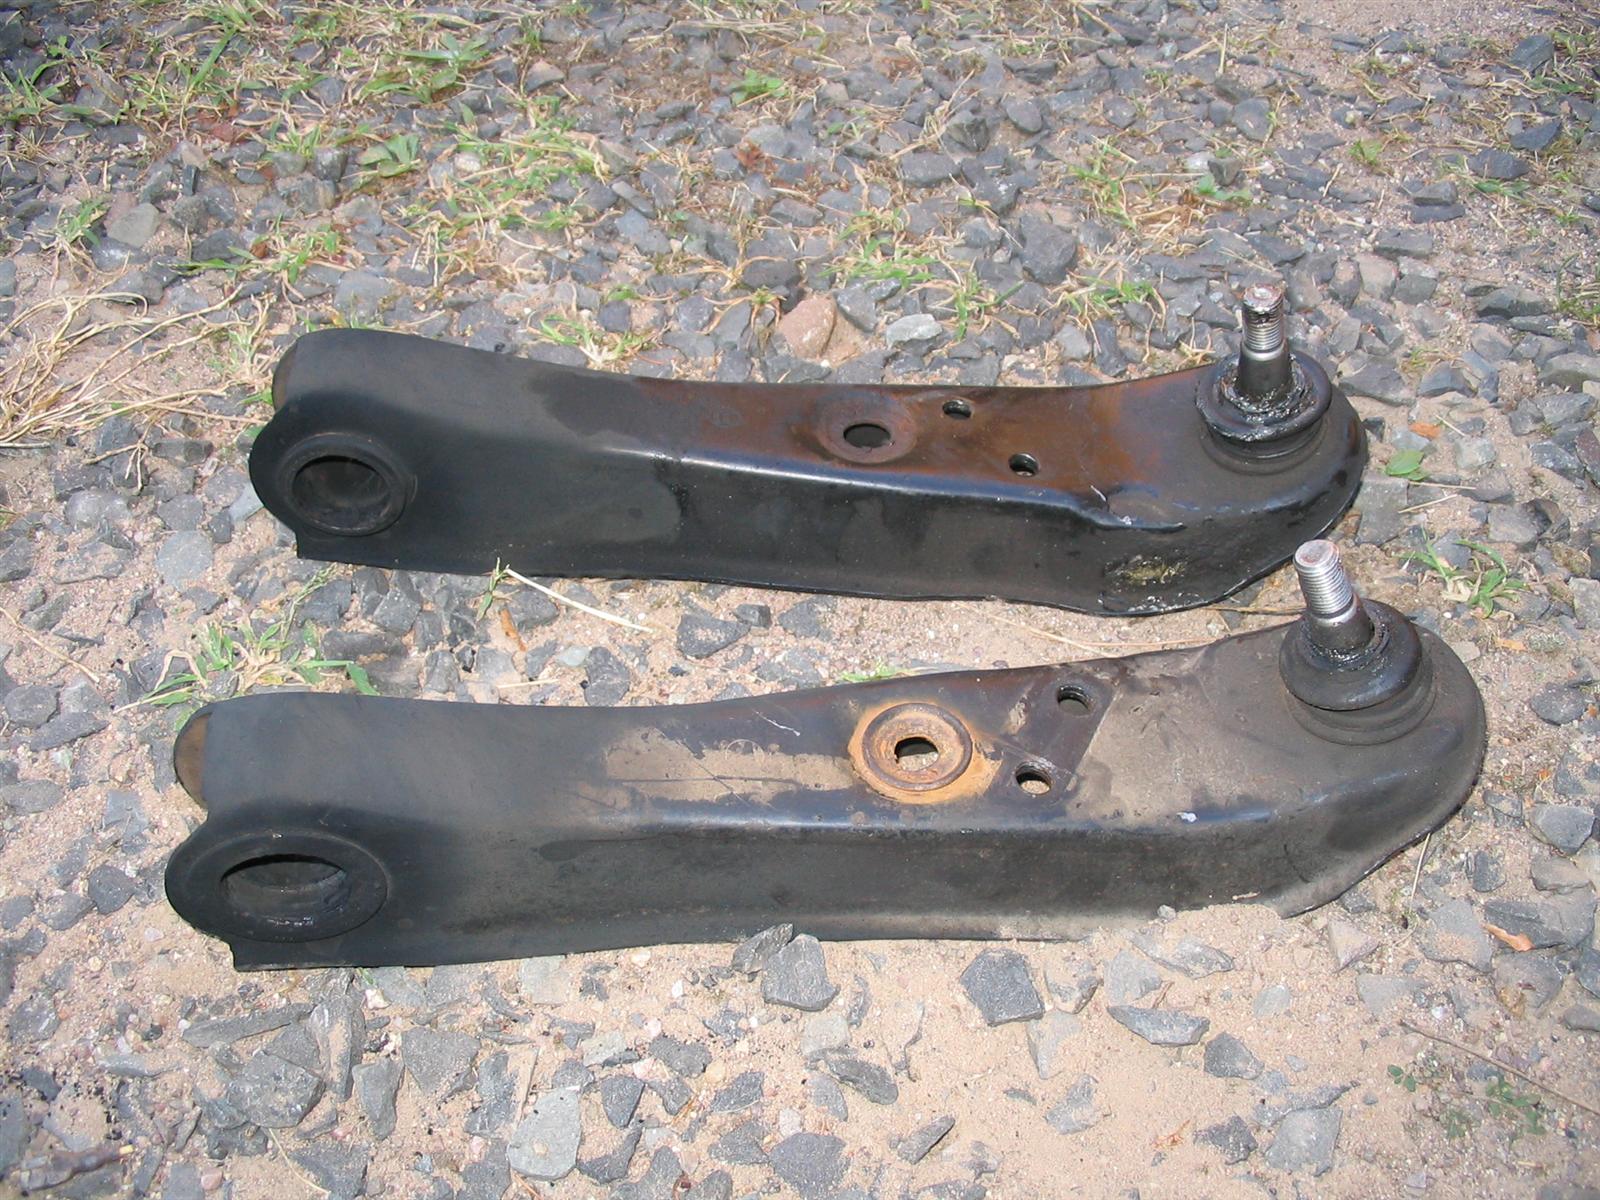
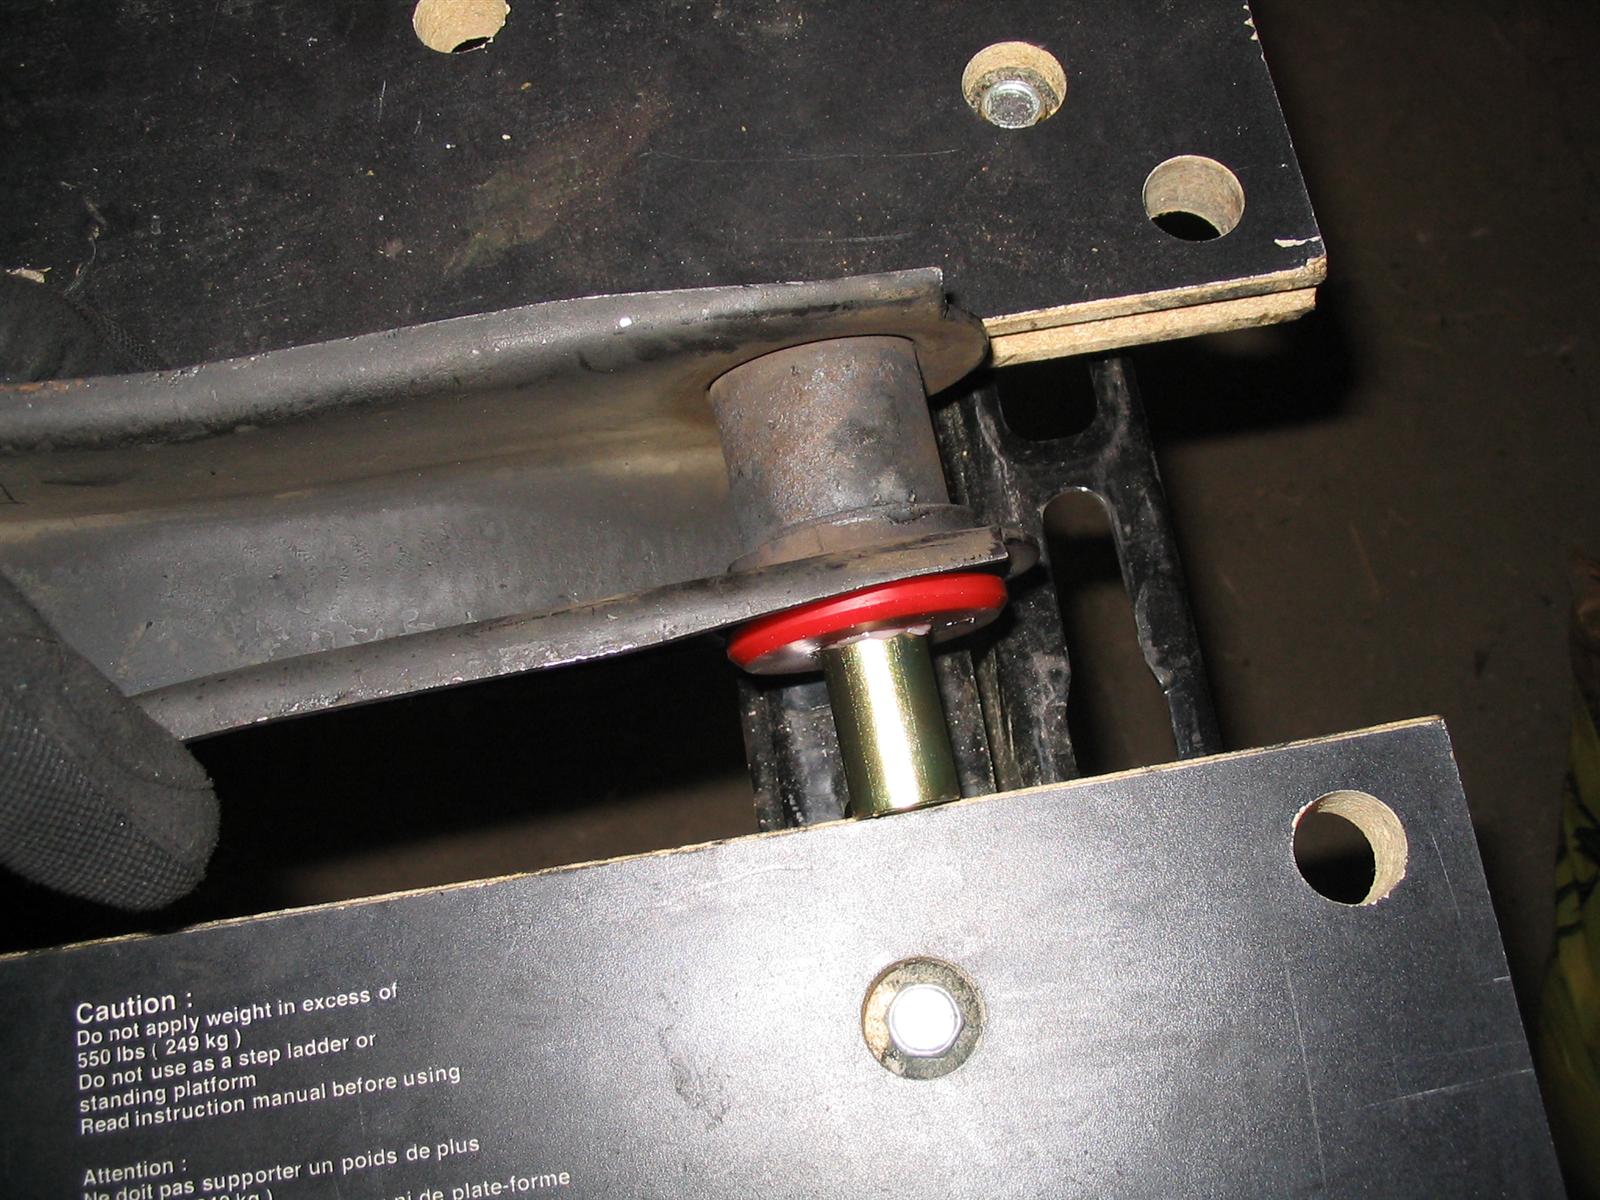
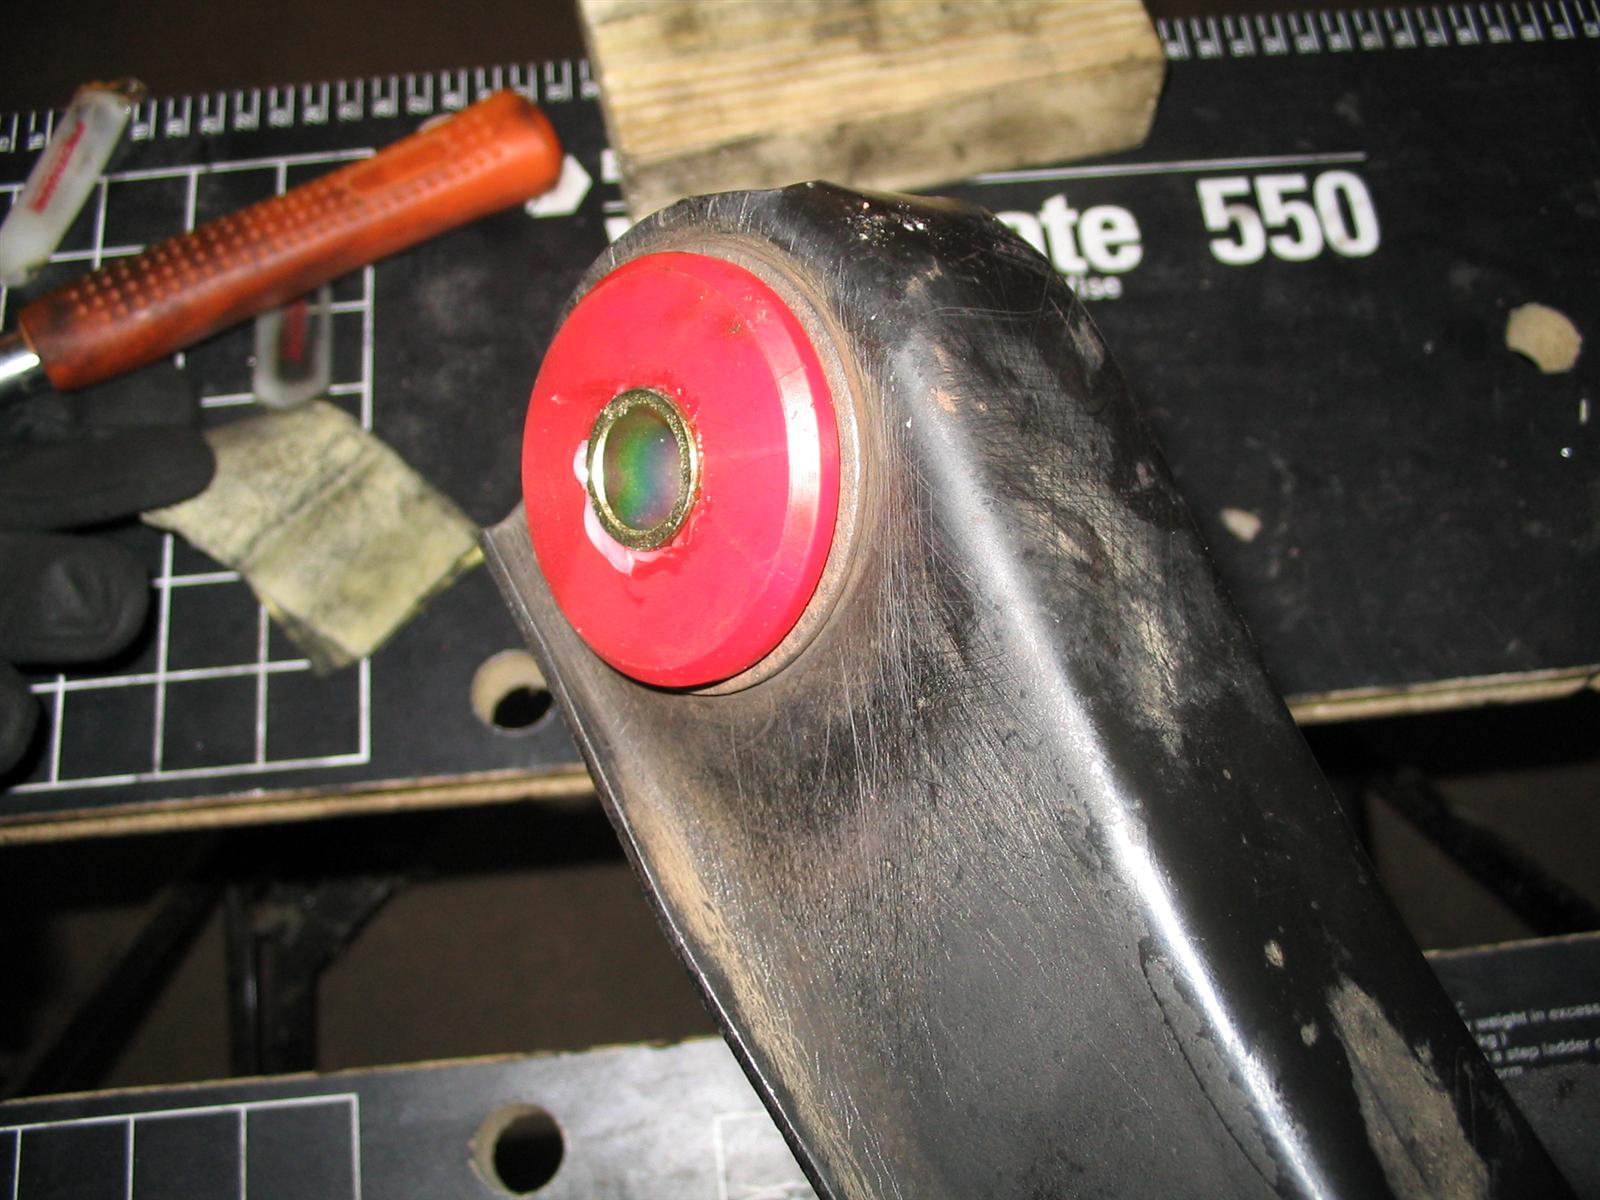
Polyurethane Control Arm Bushings
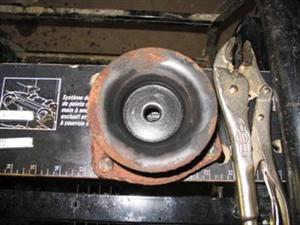
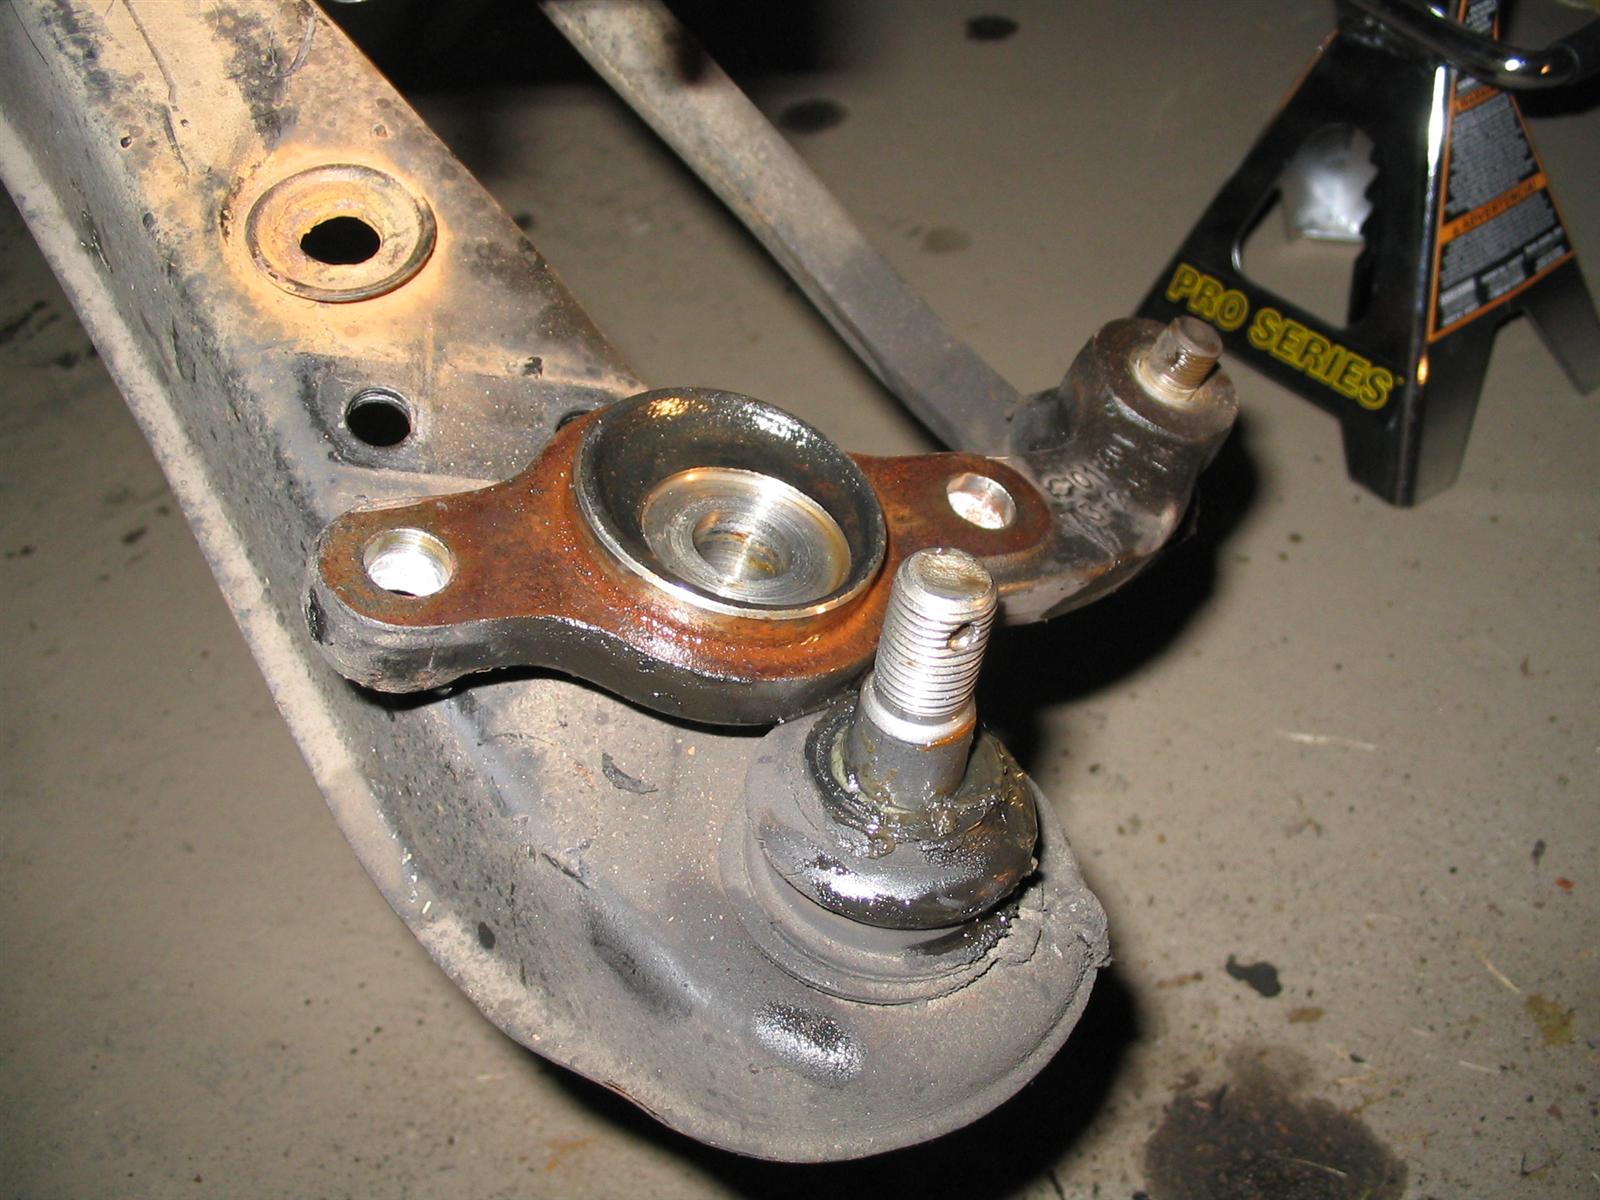
Next up for removal were the control arms. They are just a single bolt at the pivot, and the ball joint. The ball joint was stuck in my knuckle though, and I had to rent a set of heavy duty front end pullers to get them free. The easiest way to get them off was to put a good deal of pressure on them with the pullers, and then give the knuckle a good tap with a hammer near the stud. Got that method from another Z car guy out in Oregon (z_karma), and it worked like a charm.
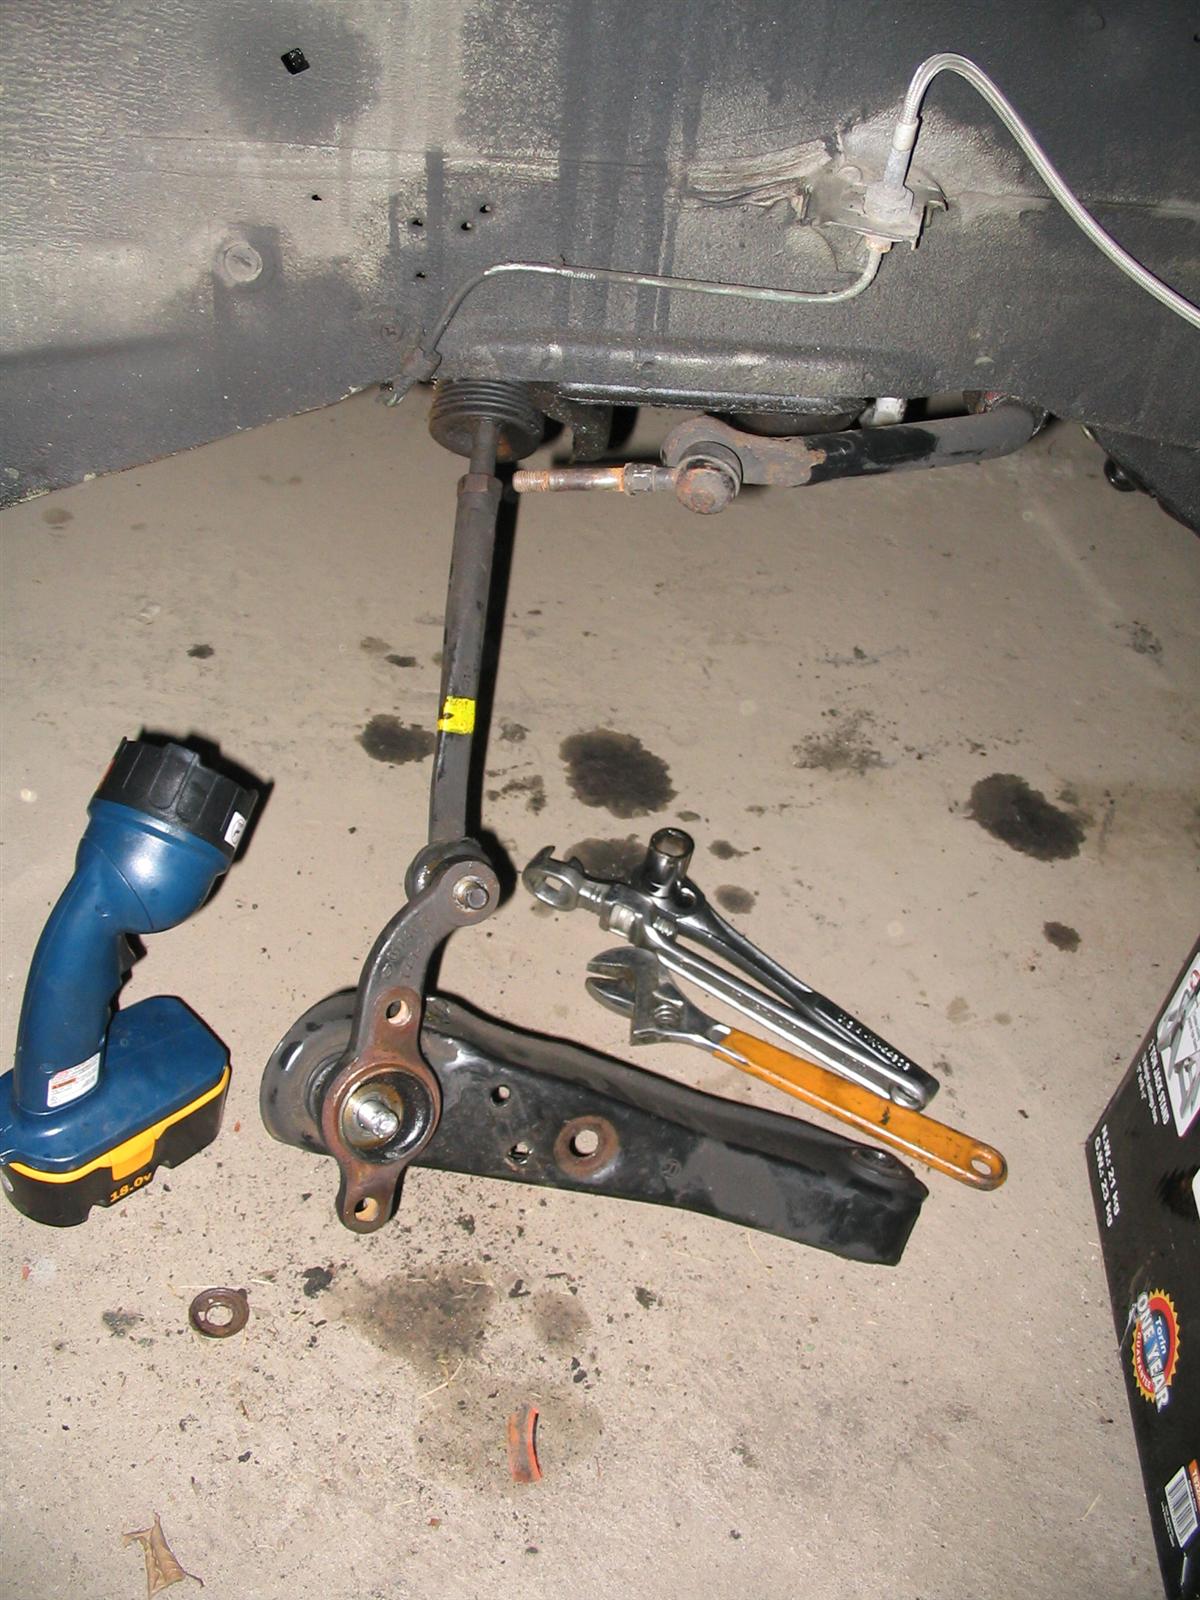 |
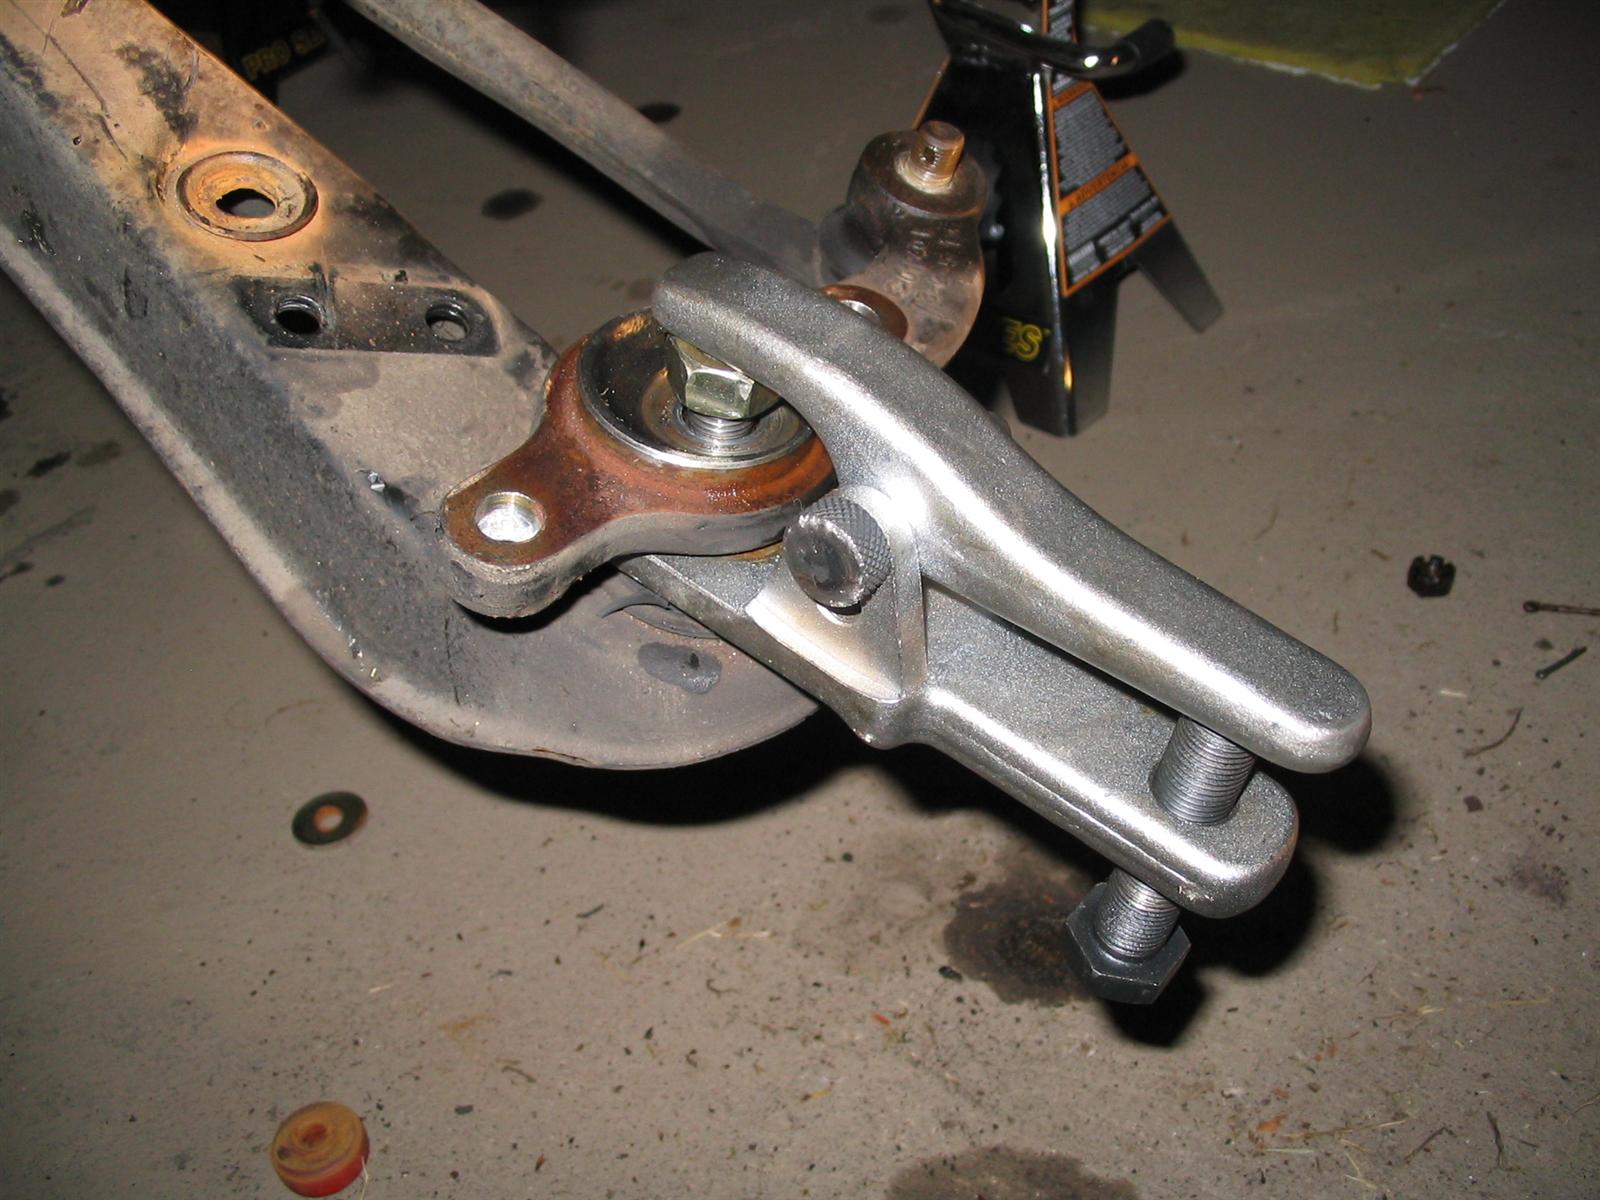 Scissors type best for ball joint. Note that the nut is on to protect the threads of the stud from the puller. |
 |
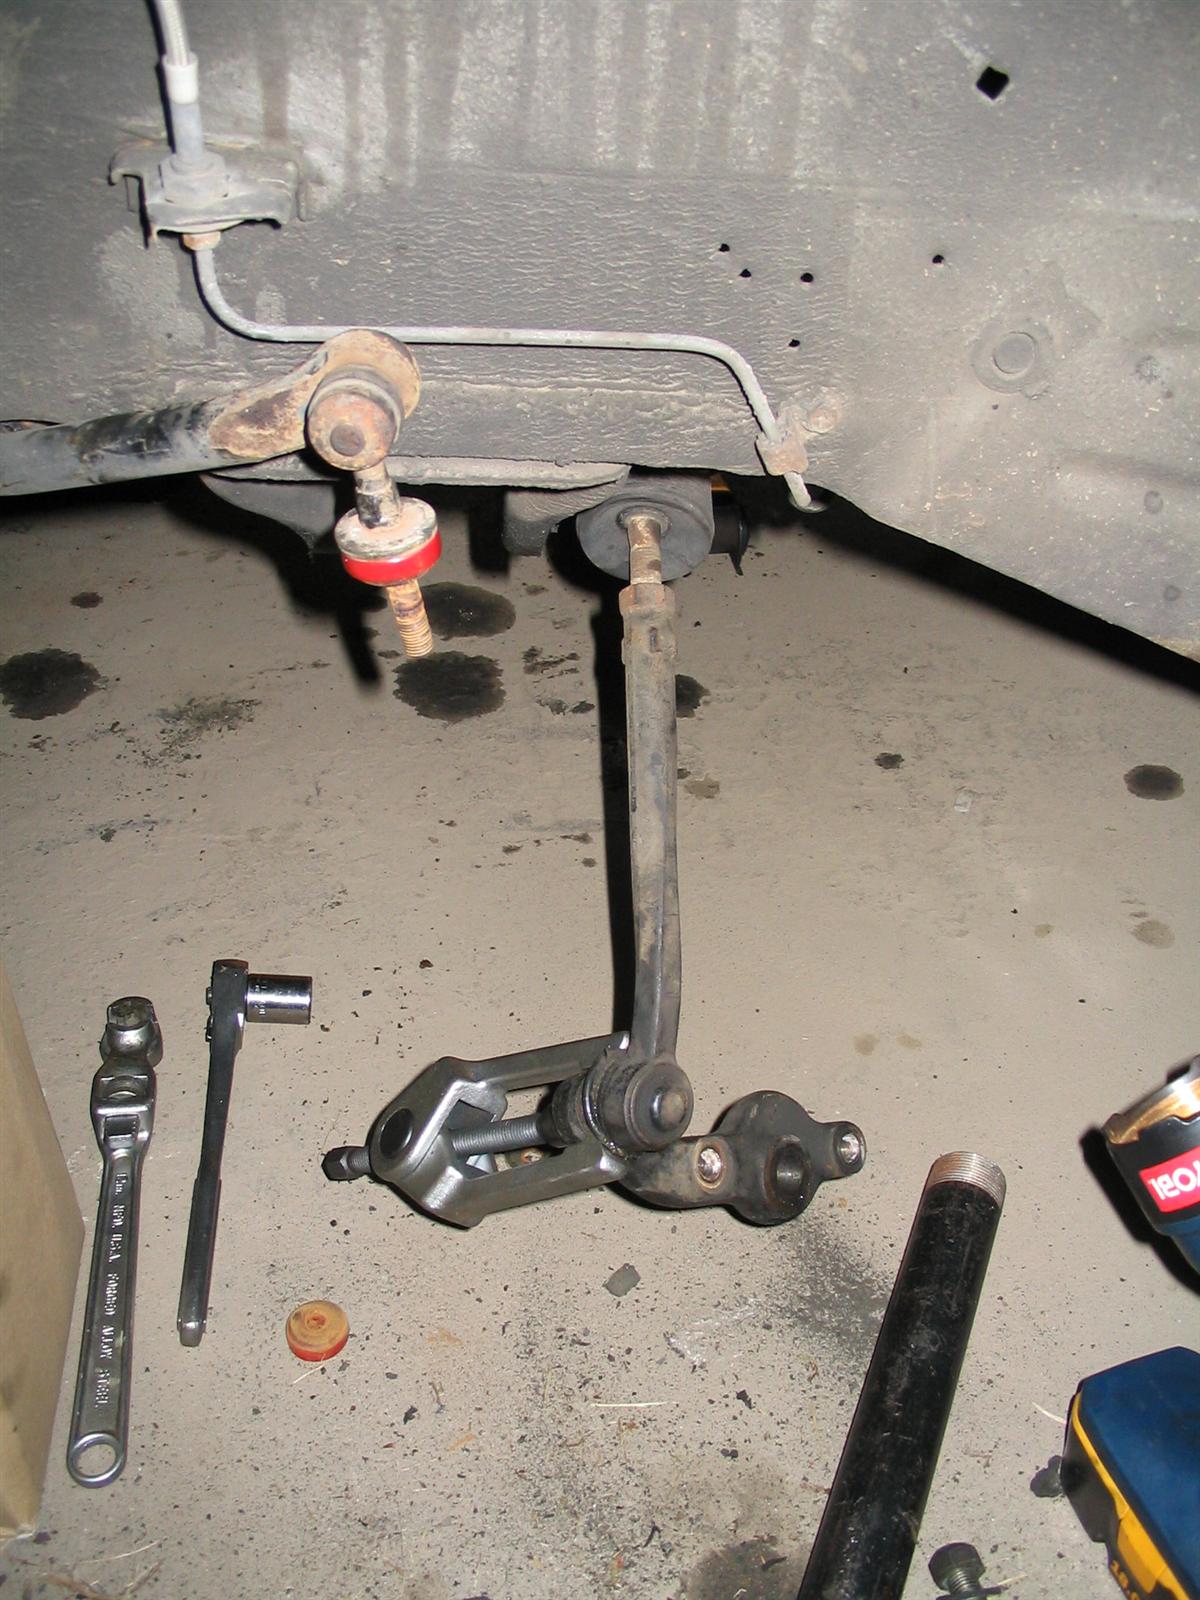 Hat type puller for tie rod |
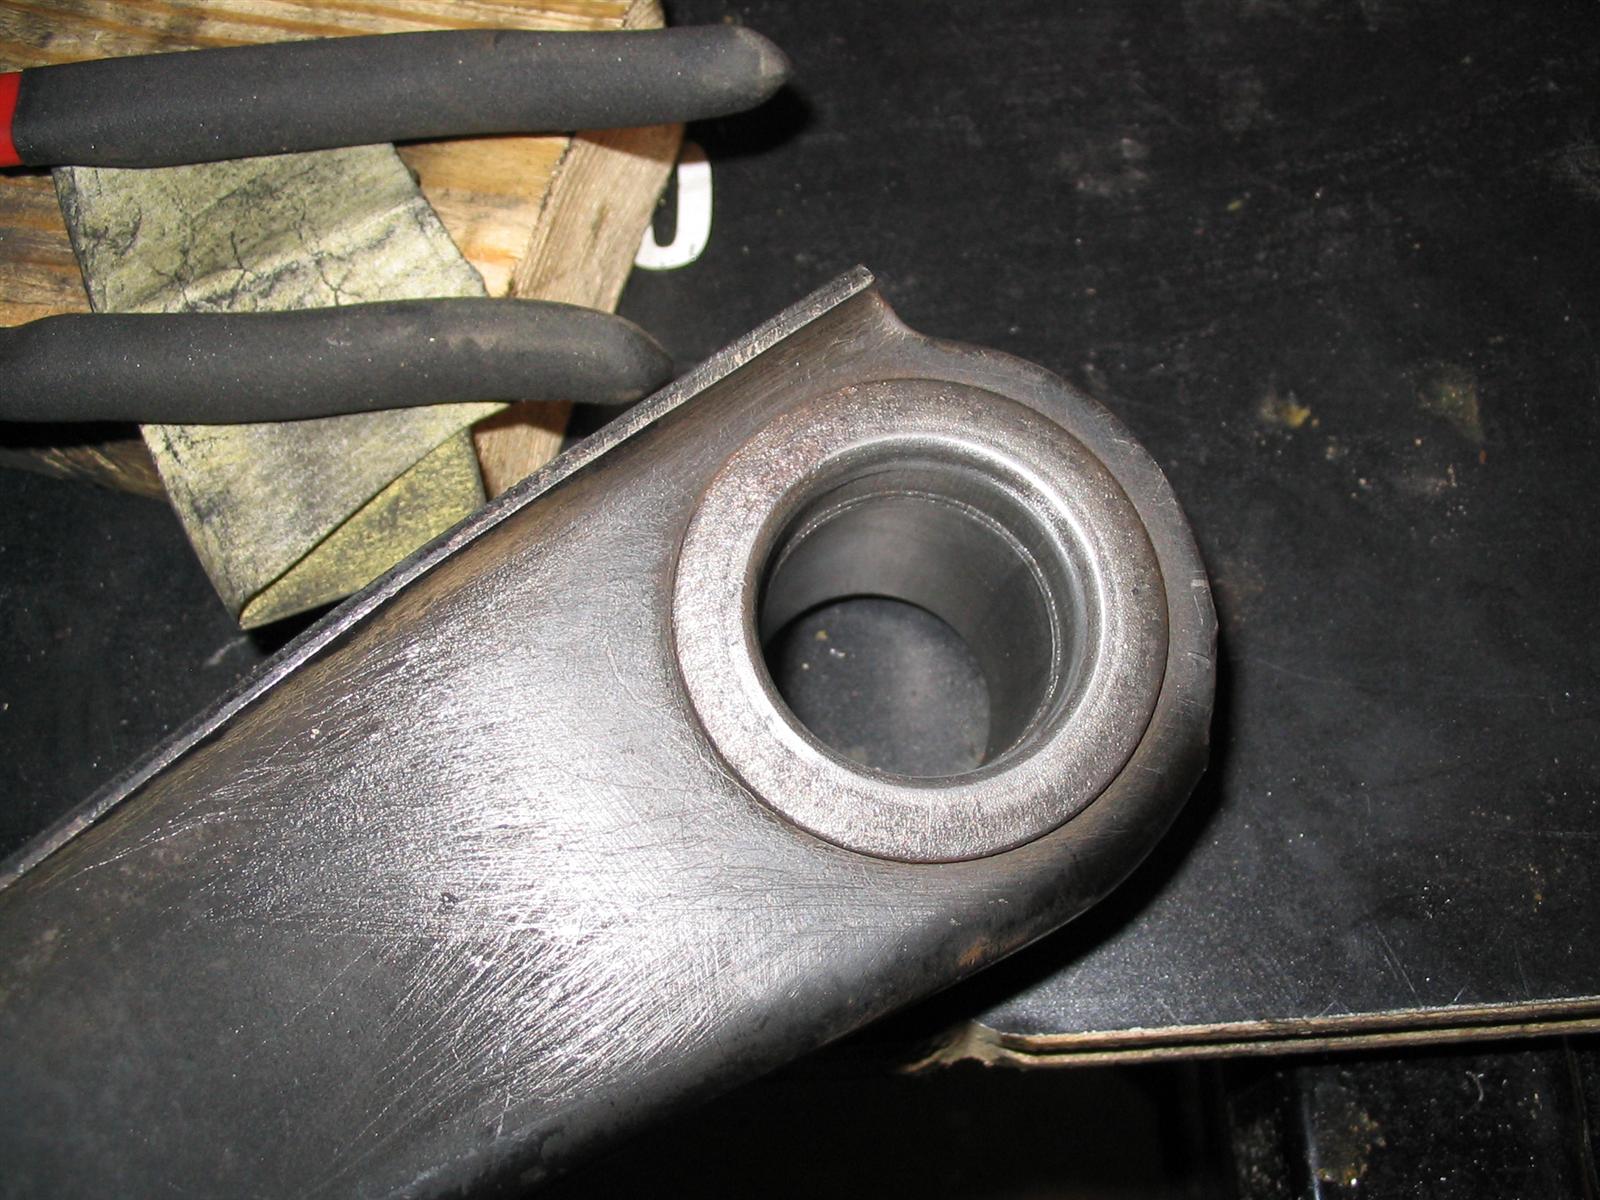
Once the control arms are out, the bushings have to be removed. I tried this first by drilling them out in the method suggested by Gary Molitor, but it seriously overheated my drill. I switched over to MAPP gas, and I was done in about 5 minutes per arm... it makes very fast work of it.
Put the control arm in a vice (workmate or similar works best) with the bushing side over a bucket of water. Use the MAPP torch to heat the center of the bushing. Point the flame down the hole and have it shoot out the other side. This will very quickly heat the bushing's center rubber core and you will be able to push it away from the metal sleeve with an old screwdriver or something while you are heating. Then heat the center of the sleeve. It will soon be able to drop out into the bucket, and shortly after that the rest of the rubber will come loose and fall flaming to the water as well. Allow to cool and then a quick wire brush/light sanding to remove the soot, and these guys are ready for their new bushings.
 Cooling |
 0 rubber remaining |
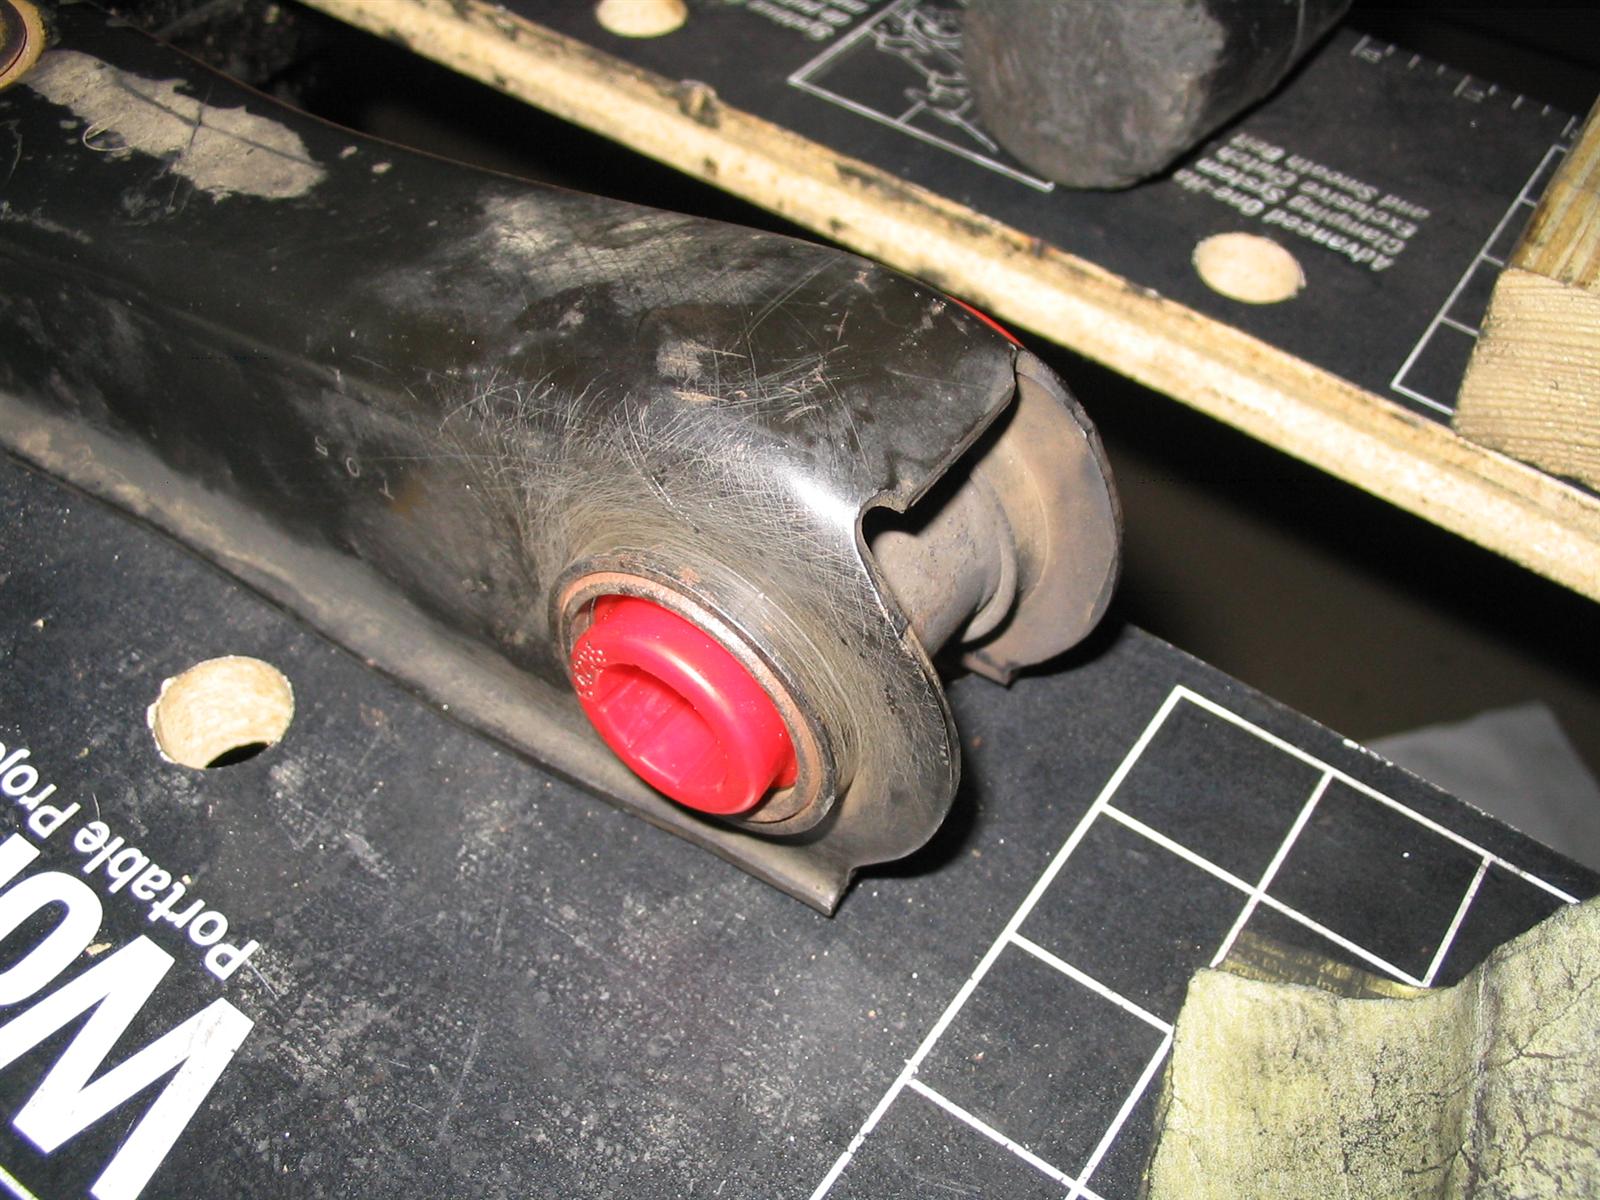
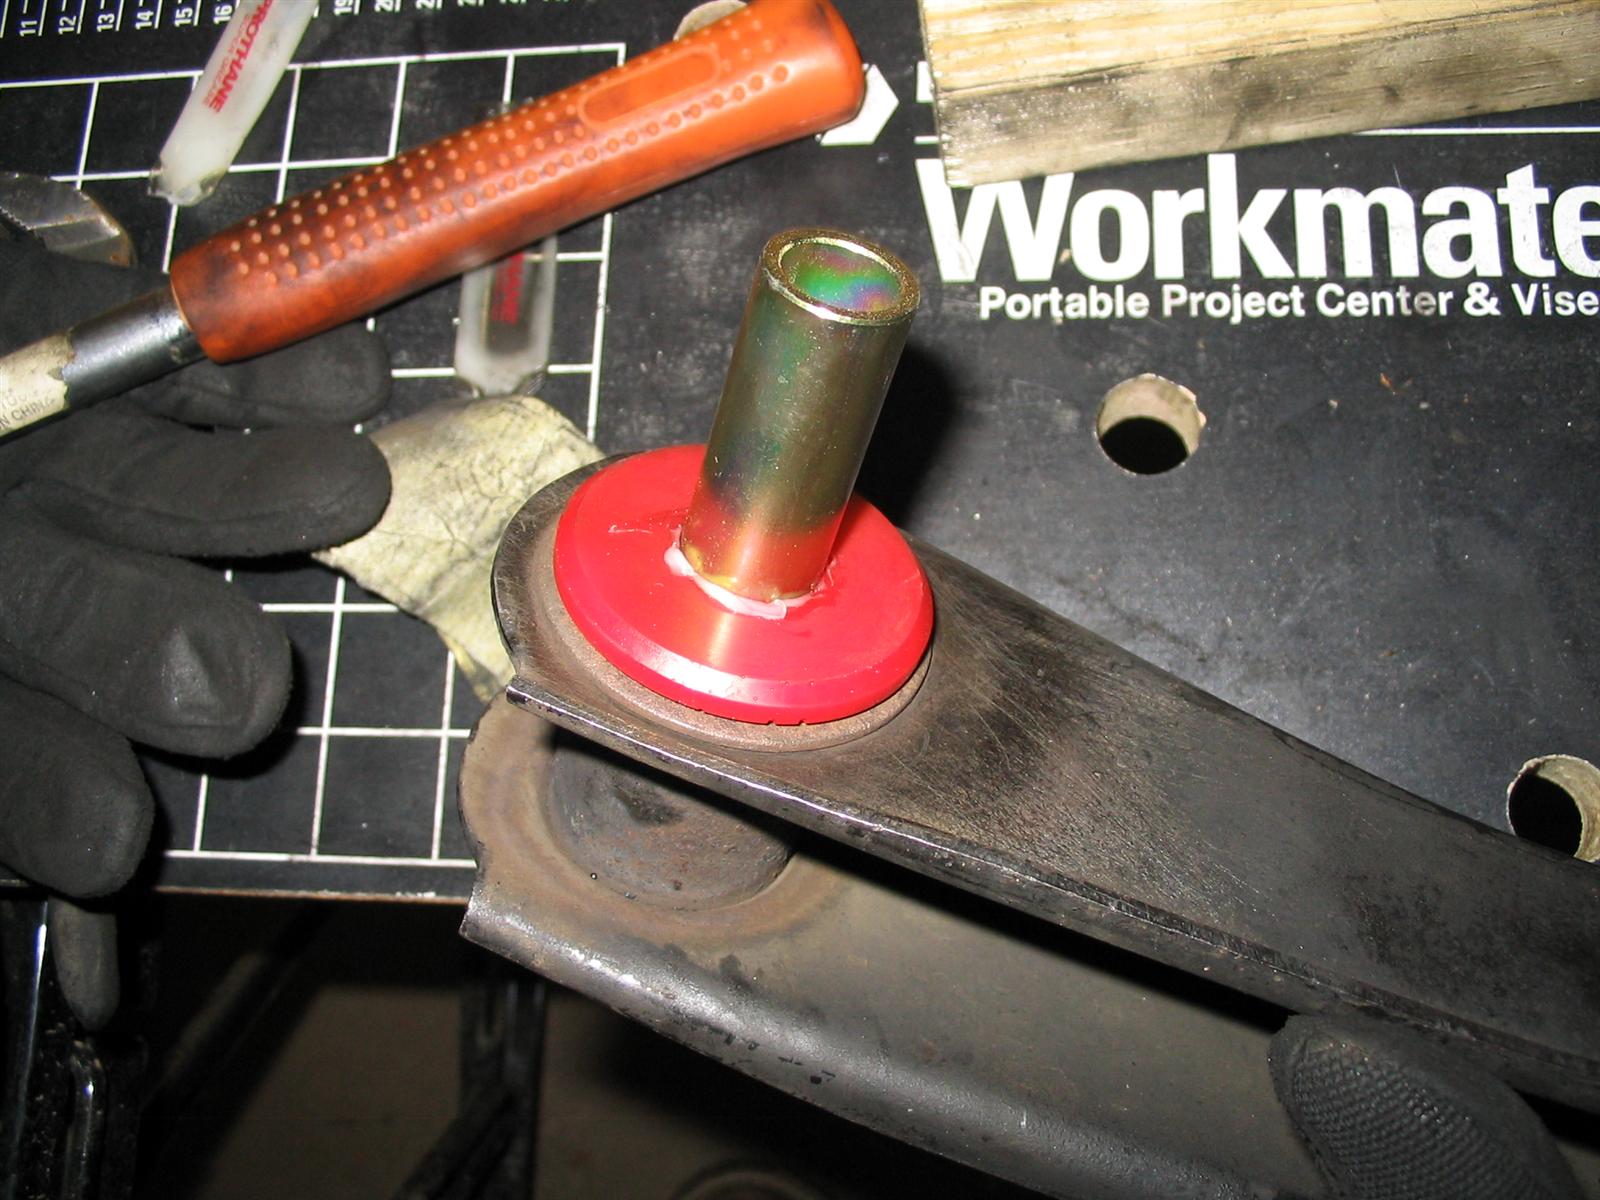
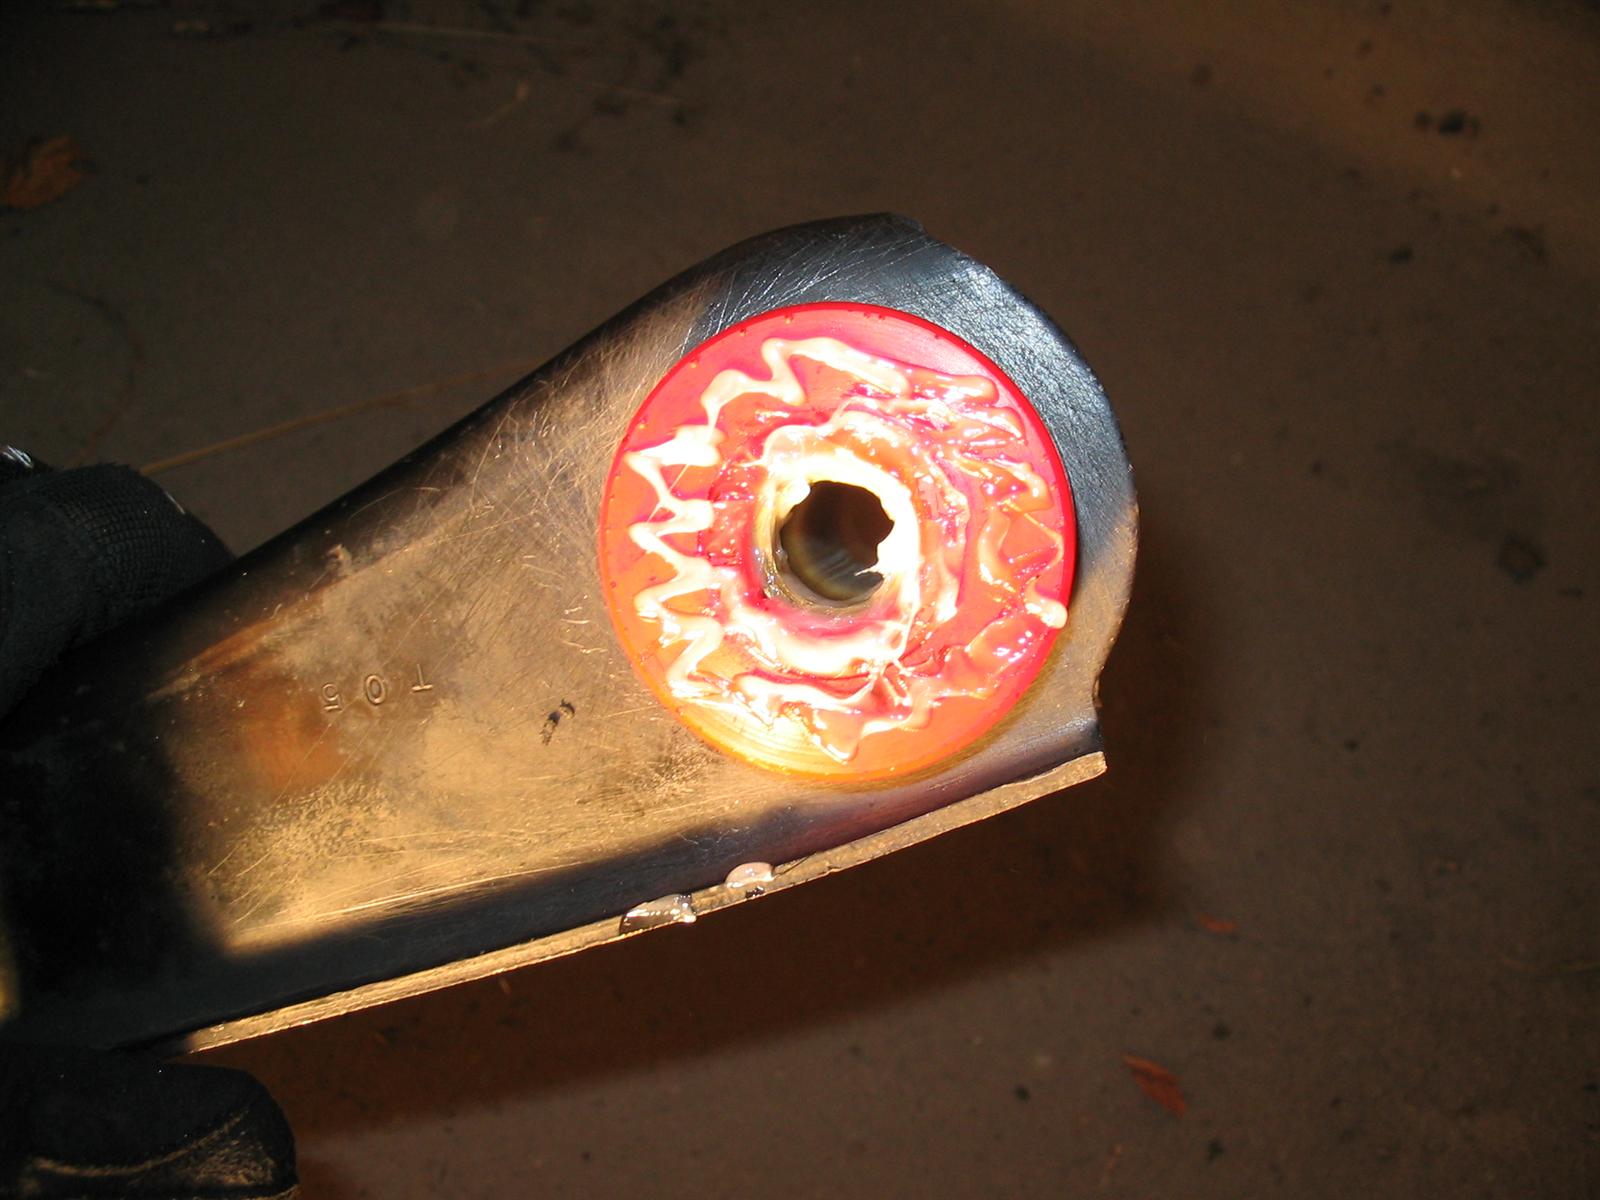
Use plenty of grease with the installation of the bushings, as the poly parts will squeak. I used my workmate to slide the new bushings into place like a press. Don't get the bushing grease on yourself or tools, it is quite sticky and will be quite a mess for you to clean up. If you do go and get it all over, use brake parts cleaner to clean it up.
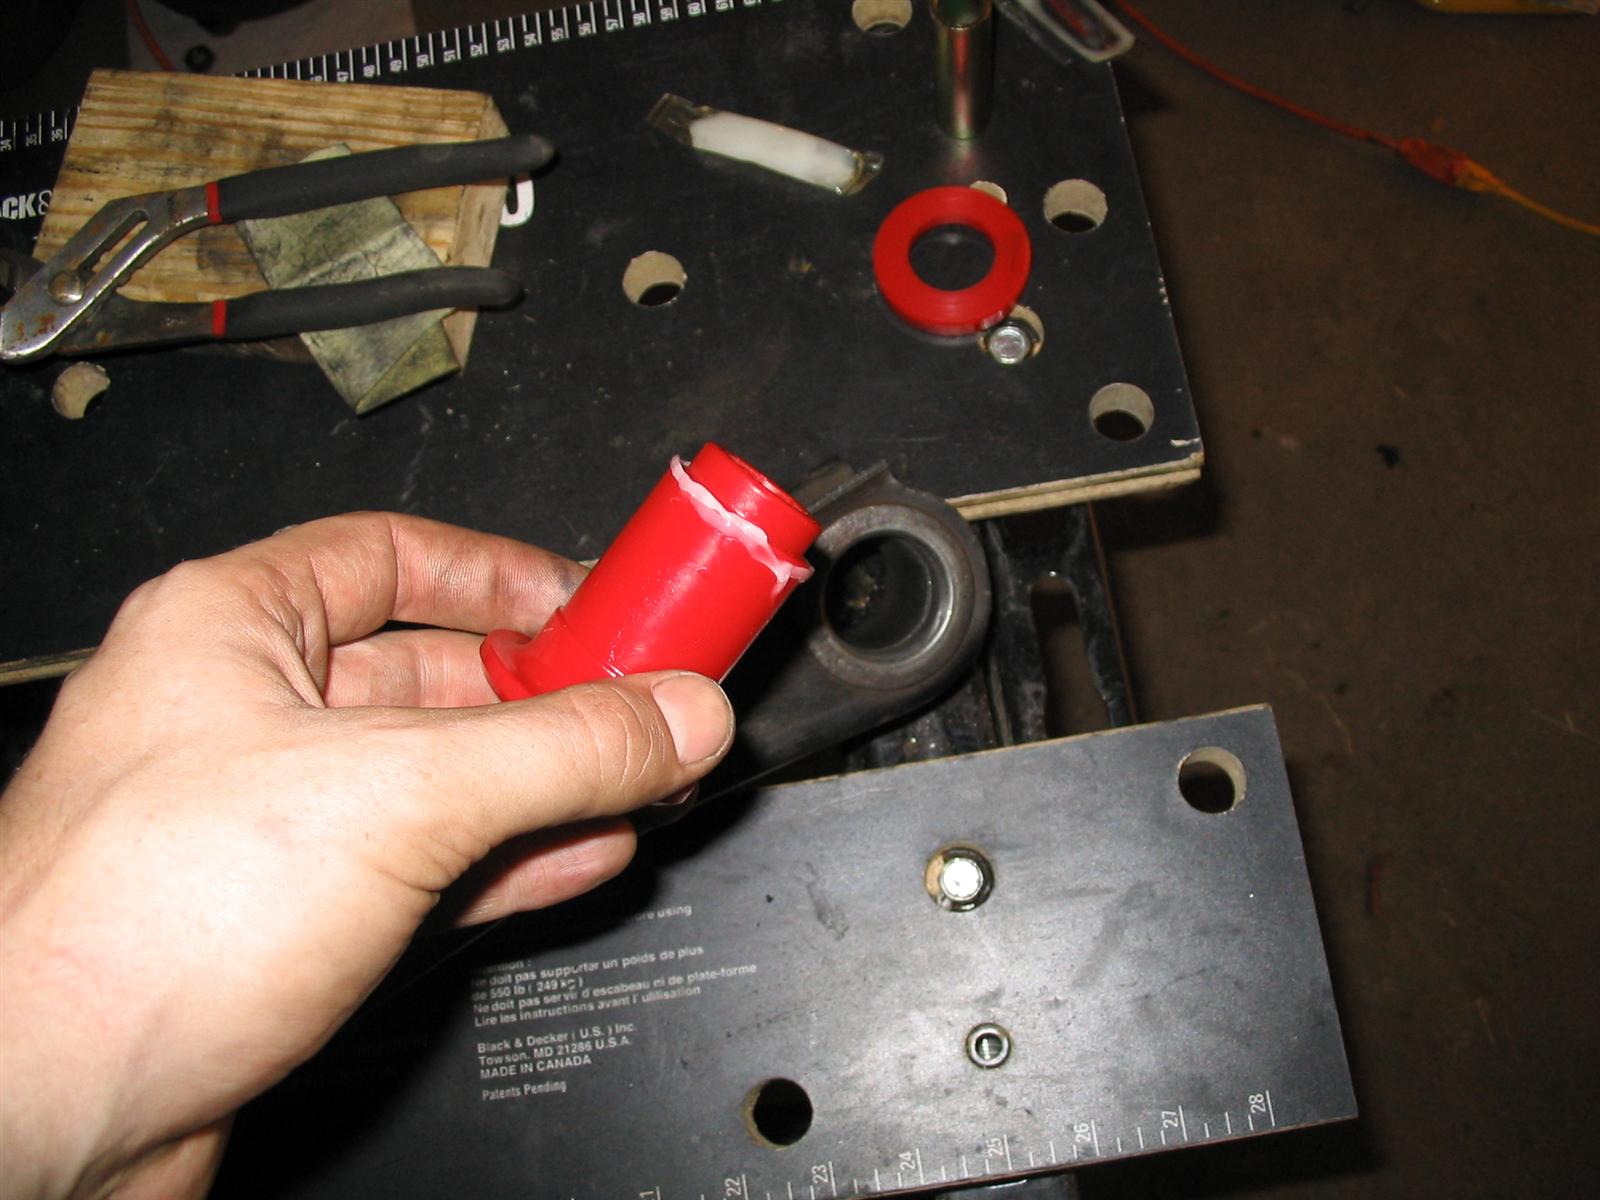 Use more than this, I added as it slid in, pulling grease |
 |
 |
 |
 |
 Nice and gooey |
I had a set of new ball joints pressed in at the local NAPA at this point so that I would not have to worry about them in the future. It is a good idea to at least check if yours have slop while the control arms are out.
The reinstallation of the parts is simply the reverse of removal, with one exception. The wheel bearings should be repacked with fresh grease, as well as the recesses of the hub, as noted in the FSM. The bearing's lock nut also needs to be properly torqued and backed off 60°.
Note: The replacement of the strut cartridges can be completed without removal of the rotor/hub assembly as well. I chose to remove them because I wanted to repack the bearings and make sure they were properly torqued, and the rotors weight quite a bit and would have been cumbersome during the swap process. I removed the dust sheild to get it out of the way as well.
The feel of the car and handling has improved dramatically. The car feels like it corners quite flat now. It would pale in comparison to Jason's coilover setup, but it is definitely sporting now at least, instead of worn out and broken. Very much worth the time. Buy the master bushing kit now, do it!
|
|||||
|
|||||